Showing posts with label frugal living. Show all posts

Friday, September 14, 2012

"No Poo" 30 Day Challenge

Hello again Cheap and Choosy readers! Today I am going to be sharing with you my journey and results with the "No Poo" method! Want a natural and easy way to simplify another aspect of your life...then read on!

Okay, so are you scared already? I am sure that by the title you are. Don't be, I haven't lost my mind...completely.

Ready....I will not use shampoo or conditioner for 30 days!

Wait! Don't leave....keep reading! I know this sounds crazy! I will explain how I came to where I am now with this challenge.

One month ago, I stumbled across this blog post on Simple Mom. She shares that she has not used shampoo or conditioner in three months! (definitely read her post...she explains it all so well!) My first reaction...GROSS! Which I am sure was, and is your reaction to my challenge. (probably that and...Lorissa has gone off the deep end!)

I learned that shampoo is actually a detergent. When you use it, it strips your hair of the healthy oils it needs, resulting in a vicious cycle...

Here is the vicious cycle that happens:
You wash your hair with shampoo.
It strips out the natural oils and creates a barrier.
Your hair over reacts and produces more oils to compensate for what is lost and hair becomes greasy.
You are frustrated with your oily hair so you wash it almost daily.
You keep stripping your hair of the oil it needs and the ends become frizzy, brittle and damaged.
Now you have to use a conditioner.
The top of your head is oily again. The bottom is dry and frizzy. 
And to top it off, you now need a full arsenal of hair care products just to get it to keep a style.

This has been my frustration! My hair is oily on the top, frizzy and dry on the bottom, and lays flat. Sure, I have curly hair but it just lays flat and is frizzy.

What I use on a daily basis...


I use a volumizing shampoo and conditioner, silk drop, a leave in conditioner, curl shaping spray, mousse, or straightening cream.

All that, and my hair still doesn't look how I wish it would! It is still frizzy, dry, brittle, and falls out like crazy!!!! Seriously...it is amazing I still have hair left with the rate that it falls out! Oh, did I also mention I battle with dandruff. This post is quickly becoming embarrassing.

You might just tell me to switch to a more expensive shampoo, conditioner, or hair care product...but really?! I do not want to, nor will I, spend $15 on a small bottle of shampoo just to get the "results" I think it may give me. Maybe you are one of the lucky ones that has gorgeous hair with out even trying. To you I say...I hate you....I mean...wow, I am so happy for you, that is awesome!  But for me, I am at the desperate...I will try anything point! And that is where this challenge came from. From desperation!

Okay,  enough of how I got to this crazy place...what to do now?!

Drop the bottle of shampoo, put away the bottle of conditioner, and hide the 300 bottles of hair care products you currently have. Go to your kitchen and grab a box of baking soda and a bottle of apple cider vinegar. Yes, you heard that right! Hang in there...keep reading!


Here is the recipe I am currently using:

"Shampoo" : 1 Cup Water
                      1 Tablespoon Baking soda

"Conditioner": 1 Cup Water
                        1 Tablespoon Apple Cider Vinegar

I simply mix up the solution and pour into a squirt bottle that I keep in the shower. From what I have read, you may have to tweak the recipe a bit to what suits your needs. If you have super dry hair you will need to use more vinegar to soften it. Super oily hair, increase the amount of baking soda. You may have to experiment for the first week to find what works for you. I have found that a little does in fact go a long way!

It will take some adjusting and getting used to. For me, getting used to not having a soapy, lathery feeling when I shampoo has been the hardest. I found out pretty quickly, that just because it isn't lathering doesn't mean it isn't getting clean! All of the other bloggers I have read also say, there is a period in which your hair re-adjusts how much oil it makes. After all, it is used to you stripping it out every day with washing it. Because of this, it will over produce oil for a time. This takes about two-four weeks (possibly as long as eight)...hang in there because your hair will adjust!

I have decided to keep a daily record of how my hair looks and is changing. I will update every week to let you know how my hair is progressing...both good and bad!(Remember this is one of the "transition" weeks so my hair will be more oily than usual while it is adjusting)

Week 1 

Day 1- First time to wash with baking soda and vinegar. I was worried the vinegar would make my hair smell funny, but it rinses completely clean- no smell! Hair feels soft and clean! Top doesn't look oily at all! I think I used too much baking soda, the top looks a little dry for once.

Day 2- No wash needed. Hair doesn't look oily yet. Still kind of dry. Must remember to use less baking soda mixture.

Day 3- Top of hair looking oily, time to wash! Hair feels clean and smells clean. Once again, I think I used too much baking soda.

Day 4-No wash. Hair looks a little oily. Put it in a pony tail. No big deal.

Day 5- Washed Hair. Getting used to not lathering. Used a little more vinegar on the ends than the last two times. Hair looks clean and feels clean.

Day 6- Top of hair looks oily. Washed hair. Didn't use enough baking soda. Hair looks and feels oily still. Washed hair again. Much better.  Hair looks, feels, and smells clean this time. I am starting to notice a change in my hair's texture. I also noticed that when I combed my hair only a few strands fell out rather than a huge amount. I wonder if that is at all related?

Day 7- Hair slightly oily but pretty normal for me even when using shampoo. Pulled it back into a pony tail.

So far I am pretty pleased with it. I wonder what my hair will be like when the transition period is over. If it is anything like the other blogger's results, I will be thrilled!

What do you think? Are you brave enough? Desperate enough? Crazy enough to give this challenge a try?

If you are still not convinced take a look at these posts: 

MSNBC.com actually wrote an article on this! Read it here!

Simple Mom gives you a hair update after using this method for two years! Read it here!

Great information from The Hair Pin on switching from shampoo and why...read here!

On Just A Couple Acres has a very encouraging post about her transition with curly hair...here! and some great "No Poo FAQ" here! 


Think about it...what if you could have beautiful hair and it not cost you a small fortune?! Forget about all of the money, chemicals, waste, and frustration that go with shampooing your gorgeous locks!

On top of that ...why not? Why not give it a try? If you hate it, you can always go back to shampoo. But if you love it, you have found the cheapest and easiest way to achieve beautiful hair.

If you are brave, desperate, crazy, or hippie enough (I think this may be why I am pretty open to the idea...my mom secretly wanted to name one of us girls Moonbeam when we were born...no joke!) to give this challenge a try with me, leave a comment below and let me know you are in! Then each week I will share my progress with you, and you all can let me know how you are doing!

This was my first post ever on going "NO POO"...You can see all of my updates here:

 No Poo Week 2 Update
No Poo Week 3 Update
No Poo Week 4 Update
My Curly Hair Post 30 Day No Poo

Tuesday, May 1, 2012

Fresh Herbs for the Thoughtless Gardener


Contributed by Anna of Not Knowing Where

Have you ever noticed that many "healthy" recipes look just like your grandmother's recipe, except they call for things like fat-free cheese or egg substitute? When people tell me eating healthy is too expensive, I wonder if it's because they're reading recipes that call for specialty versions of high calorie food - like fat free butter or sugar-free honey.

When I was in college, my grandmother gave me a cookbook that has been a mainstay on my shelf for 15 years. It's a health food book with virtually no substitutes, just good healthy food plus herbs and spices. It taught me that the secret to great cooking is not more butter or mayonnaise, but more guiltless, honest flavor. 

Eight years ago, I started an herb garden outside my front door. Over the course of a few years, I planted just about everything I liked to cook with, just to see what happened. Freshly picked herbs are incredible!

But here's the thing - I'm a horrible gardener. Maybe half my sprouts survived a season. Very few took hold in the long run. So anything that survived did so despite me, and certainly not because of me. In a strange way, that makes me feel uniquely qualified to make herb garden suggestions. I am here to tell you what herbs to grow that are insanely delicious, and yet have great resilience to the thoughtless gardener.

The ones that make the cut here survived multiple years under my care (or lack thereof). I asked my husband, the gifted gardener, to proof this post and make suggestions. In addition to some careful corrections, he made multiple suggestions of herbs to add. To which I mostly responded, "Nope, I killed that... Can't do that one; I killed it twice... etc." This is not a comprehensive list of herbs that gifted gardeners consider to be easy, but only the humble opinion of one who struggles. Sometimes I feel like too many bloggers only talk about what they are insanely good at. However I'm silly enough to post about my weaknesses, on this, my first contribution to The Cheap and Choosy. Am I crazy? Probably. But here goes!

Mediterranean spices: Rosemary and Culinary Sage
The Mediterranean climate has a rainy season and a dry season. In other words, you can be like me and totally forget to water your sage, then follow this neglect with a period of avidly watering it every day, and then go back to forgetting about it completely. Rosemary, once established, almost never needs to be watered if you live somewhere that experiences periodic rain. The culinary sage gets periodically stressed, but so far has always bounced back. The sage's only problem is bugs. Our rosemary (that I planted!) is large enough to take over the world. Rosemary and sage are both perennials in many zones.

Italian Spices: Oregano and Basil
Oregano will die off to a pile of twigs in the winter, but then generate new growth the next spring. Be warned, there are many varieties of oregano, and they don't all taste awesome. Make sure you know what you're getting, because you will have it forever. Basil is not a perennial in most zones, however it is prolific while it grows. I once decided to hack off the entire plant at its base in June because I was going to travel, and there was no one to water it. When I returned from my trip, it had started growing back. This trick seems to only work in the early summer. If you wait too long, then it will take the hint and die. 

Garlic
I find garlic to be particularly miraculous. In October, go to the store and buy a few bulbs of garlic from the produce section. Divide it into cloves, and bury each one outside. Water it periodically until the weather starts to freeze. Then do nothing until the following spring. If you like spring garlic, then you can pull some up early to eat. In this case, you eat the entire spring garlic plant. If you want full, mature bulbs, then you wait through the summer until the stalk is almost completely dead. Dig up the bulbs, and you have a year's supply of garlic. Store them in a dry place.

Now is a great time to start planting herbs in your yard! Transplants are often best, as many herbs propagate better from cuttings than from seed. Potted herbs can be tempting because there is less weeding involved. However my experience has been that there is no substitute for the plant being in fertile ground. Potted plants dry out faster and do not over winter well for the thoughtless garden. 

The gardening husband insists that there are many more easy-to-grow herbs. Please share your experience if you have a favorite, hearty herb or spice in your yard. The Cheap and Choosy would love to hear your story. 

Friday, February 18, 2011

Easy {Two Ingredient} DIY Wrinkle Releaser!

Ironing is problematic with a toddler on the loose! I have a really hard time remembering to turn off an iron...even before Ellie came along! Thank God for the automatic shut off! I *rarely* am there to get clothes out of the dryer as soon as they are finished. Laundry is going on during the midst of many other things! I also have a hard time doing ironing all at one time because I usually have multiple chores going on at once. It's just the way my brain works and I'm learning to work with my personality, not against it!
The fact that an iron may be set up for extended times, and that though I *intend* to close the door to my bedroom when the ironing board is set up and Ellie is playing in the hall while I shift laundry, sweeping, or  -you name it-, I cannot trust myself to remember. That's just a fact! Therefore, I was super excited when I saw this post on Somewhere in the Middle via the Raising Homemakers' Wednesday link up a few weeks ago.

Turns out that one teaspoon of liquid fabric softener per one cup of water in a spray bottle equals perfectly effective wrinkle releaser, fabric relaxer, whatever you want to call it! I used to buy this stuff during my single overly busy teaching days, and I have to admit, I almost feel silly using it! I feel a bit lazy, but now that we have a toddler around, I do think it's a pretty handy thing!

When I pull the clothes out of the dryer (wrinkled, of course), I'm spraying, stretching, and shaking out the shirts that matter and hanging them separated so that they can dry. Voila! 

As I've been getting out wrinkled summer clothes to pack for Brazil I've realized that taking a bit of this along will really come in handy as well since ironing will be out of the question!

I bought a spray bottle and liquid fabric softener at Dollar Tree. However, the spray bottle only shoots a single stream of liquid, so I had to use a different one. In the future, I will also look for a fragrance free fabric softener because we are not used to smells and it's a bit overwhelming!

*Image Courtesy of The Graphics Fairy.

Tip Junkie handmade projects

Tuesday, February 15, 2011

A 'More With Less' Valentine

Both my daughter and I are dealing with pretty bad colds, and were unable to go anywhere on Valentines day. My hubby and I aren't really big holiday people in that we don't think about them very well in advance. We love giving gifts and cards but tend to enjoy it more spontaneously than due to established holidays. For that reason and because Lydia and I have been sick, we had no plans, no cards, no gifts, 'no nothin' for Valentines day.

I had a surge of energy before Tom came home for lunch and wanted to make him something sweet. The cupboards are pretty bare as it's time to re-stock on some essentials, but thanks to More With Less cookbook, I was able to throw together  a couple of sweet (but not too sweet) treats.


 The first was "Date Oatmeal Cookies" on page 286. We don't keep dates around, but we did have some raisins and made them Oatmeal Raisin Cookies. We had all the essential ingredients and they came out yummy. At first they were looking questionable when I peaked into the oven so I made a back-up of some "No-bake Cereal Cookies" on page 287 with rolled oats in place of the dried flake cereal.

I made two very last minute cards with card-stock and crayons. One for Lydia to scribble on and one from me. Lydia's got taped to the door for Daddy's (aka "dah tee") arrival. It was the first time she'd held a crayon or scribbled! Double special!


It was simple and fun and didn't' require buying anything we didn't have! Thank you More With Less!!!!


Saturday, February 5, 2011

Wool Dryer Balls from the Willow Store {Review and Giveaway!}


You may remember my review of the Willow Store's Sprout Change reversible hybrid reusable diaper a couple of months ago! Well, as wonderful as it is, cloth diapers are not all the Willow Store has to offer.

Willow Store offers organic kitchen cloth, known as "forever cloth," reusable bags, feminine care products, and natural laundry products and more! Today It's my honor to review for you Willow Store's wool dryer balls! 


These wool dryer balls are natural wool felted, and handmade right here in the USA! These dryer balls last for many years and are effective in reducing drying time for all laundry, and naturally softening clothing.
If you use cloth diapers like me, especially in the winter when it is too cold to hang laundry outside (for me anyway), I appreciate anything that can help me keep the electric bill down by reducing the drying time especially of absorbent loads of towels or cloth diapers.

I have enjoyed having this set of three wool dryer balls. They are extremely soft and are very light. Therefore they do not make loud thumping sounds in the dryer! As a matter of fact, I can't hear them at all. This is wonderful for me because the dryer is normally a nice soothing background noise when my daughter is sleeping, but dryer balls can make enough thump to wake her up or keep her from sleeping. 

I had also been having a problem with a lot of static this winter, especially with my cloth diapers after pulling them out of the dryer. I kept shocking my little one! I have not had that problem at all since I started using these dryer balls! They really help reduce static electricity!

Aside from their functional use, these balls are the perfect size for my toddler's little hands (about the size of a tennis ball). She *loves* balls, and these are super soft and easy for her to throw! She loves playing with them between loads! Not only that, but she's become my little helper with the laundry. She helps me put things in, close the door (her favorite part), turn the knob, and then press the button and watch it go. Now we've added the step of her putting the dryer balls into the dryer each time. That one she can *truly* do by herself and makes her feel super proud!

I definitely recommend Willow Store's wool dryer balls!

 ***Giveaway!***

Willow Store is offering one very blessed reader their very own set of wool dryer balls!

Here's how to enter:


Go to the Willow Store  website and come back here and leave a comment telling me something you learned or which product you'd most like to try.

(Leave a separate comment for each entry. Include your email address if it is not easily accessible through your blogger profile.You do not have to have a blogger profile to enter, as long as you leave a valid e-mail address.)
 
Additional Entries: 
Subscribe to The Willow Store Newsletter!  (right side of home page)

Like The Willow Store on Facebook. 
Follow @TheWillowStore on Twitter! 


Like Life as a Global Mom on Facebook! (Right sidebar) 

Follow Life as a Global Mom via Google Friend Connect (Right Side Bar).

Follow me on Twitter.

Grab my new button!

Blog about this giveaway.

Tweet about this giveaway using @TheWillowStore and @cheapnchoosy. (Up to 3 times daily)

Subscribe to Life as a Global Mom via email. (right sidebar)

Link this post up to any Giveaway Linky and just leave me a comment with the link! (3 entries per linky entered!)
Share about this giveaway in whatever social media venue or forum you wish.  As long as you can provide a link to it, it counts!

Comment on one of my non-giveaway posts. (One entry per post commented on.)

 This giveaway is open to everyone everywhere until March 4, 2011 at 11:59 p.m. EST. The winner will be chosen using a random number generator. I will email the winner, who will have 48 hours to respond. If winner does not respond within 48 hours, another winner will be chosen. I will post the winner when the selection has been made and confirmed by the recipient.


This is not a paid post. The opinions expressed are completely my own! I received the product reviewed free of charge.  You can see my full disclosure here.

Wednesday, January 26, 2011

Very Easy {Two Ingredient} Homemade Liquid Handsoap

A while back I wrote about how using bar soap over body wash for bathing helps avoid waste, saves money, and saves unnecessary packaging. I guess this is again where the "choosy" wins out over the cheap, because when it comes to hand soap, I prefer liquid. I don't like the  grunge that inevitably builds up on the soap (or so it always seemed at my grandparents' house growing up).

I read on a forum somewhere a few months back that you could make your own liquid hand soap by grating up a bar of soap and boiling it in 6 cups of water. I finally got around to trying it last week. I was concerned when I "Googled" it because I almost always saw glycerin as an essential ingredient in most recipes. If you follow my blog you know I like things uber simple with as few and as "common" ingredients as possible. Glycerin is very cheap and would last a long time though so I'm not knocking it. However, since I didn't have it around, I asked a fellow blogger if it was necessary and discovered that if you use regular bar soap, rather than castille soap, the glycerin is not needed because it already has it.

It worked REALLY well, and was simple enough to make it worth doing again. I was treating it as an experiment, and doubtful that I would do it regularly because of time constraints, but I definitely will continue because it's very easy to do while cooking dinner or any time for that matter. Here's how:

1. Grate bar of soap. (I used Ivory because that's what we typically have around.)


2. Bring 6 cups of water to a boil and add bar soap. Stir until soap is dissolved.


3. Turn off heat and let cool for 15-30 minutes or long enough to be cool enough to put in soap dispensers.


4. Put in dispensers and let sit until it thickens up. With Ivory it turned a whitish color.


Scratch liquid handsoap off my shopping list! Yay!

*Added Note, 2/18/2011
When I went to make another batch of this I realized that a good bit of soap was still clumped together in the dispensers. I just added a bit of warm water to each one and shook them up and they started shooting out soap again, a bit more liquid, but plenty of soap to do the job!


Tip Junkie handmade projects

Friday, January 21, 2011

Simplifying and Creating Space with Hanging Jewelry

I love getting rid of things. I like getting rid of clutter. It takes a lot of effort as I'm not the most organized by nature, but it's so refreshing to travel light. Less is definitely more in my book.

Some time back I saw a friend's bedroom and noticed she had all of her jewelry hanging on pins on a corkboard beautifully covered with fabric and ribbon.

I had my jewelry in a medium sized jewelry box on a small shelf in our room. Since we have a big closet, we'd already moved our desk and desk top computer in there to create space in another room, and I was ready to get that little shelf into the closet as well since there was a perfect spot for it that was otherwise unusable space. The only problem was where to put the jewelry box. I knew it was time...jewelry on the wall, jewelry box out of here!

I was going to make a fancy one, but I found an attractive one for 8 bucks or so at Wal-Mart that matched our color scheme well. Yet again, less is more! Here it is:


I should also make a rule that if it can't fit attractively on this board, I shouldn't have it, or should get rid of something else!

Friday, December 31, 2010

Pregnancy Tests for $1!

Recently, I shared the news that Dollar Tree had microfiber towels, which are great for dusting, swiffing, and stuffing cloth diapers. That was the first time I'd been to a Dollar Tree in ages. What I didn't tell you is that the reason I made that trip in the first place.

I went because a good friend told me that she got her pregnancy tests there, for a dollar of course. The awesome thing is that either her doctor or a nurse told her about it! Turns out, that is where at least that doctor's office gets their tests. I don't have any cited source or research, just word of mouth. However, I don't doubt it since I found that Dollar Tree does have a website from which you can order in bulk!

I've been using these, and they seem to work fine. This is great news if you're hoping to have a baby and want to be able to check more often without throwing away $15-$20 every time!

Friday, December 17, 2010

Taking the Surprise Factor out of Christmas

We only buy gifts for immediate family in order to keep it simple, and I *try* to make handmade gifts for extended family and friends each year. (This year I've made a few, and the relative silence on the blog is me trying to make some more!) In spite of all this, Christmas came as a surprise to us last year, and the year before, and the year before, and...


We ended up buying gifts using a credit card, and ended up carrying a balance for a couple of months, because we didn't think about it until...December!

My husband and I both have always had frugal "tendencies," better said,"intentions." Neither of us would make big purchases without serious thought and prayer and would always look and wait for an amazing deal. Neither of us enjoy shopping. As a matter of fact, we both rather loathe it. We don't feel a need or desire for a big house and new fancy everything. My motto is "less is more." I've always wanted to travel light, and not accumulate a lot of "stuff". I'm the opposite of a pack rat, I go through closets and drawers periodically looking for things to give away, throw away, or sell. My mom used to go through the trash cans after me and pull things back out. (It's really amazing that I still struggle with being messy in spite of this. I've been wanting to get rid of all furniture that provides a place to put random things and get cluttered up, like our dresser. I don't think we need it, but my husband is not convinced! He definitely will not let me get rid of the kitchen table. I can't imagine why! ;)

All this said, because of our lack of need to "keep up with the Jones," we fancied ourselves quite frugal, but in reality, in spite of my husband's disciplined attention to our finances and wonderful organization, we still managed to only be able to save very little relative to what we should have been able to and we would regularly "get in trouble" come Christmas or any other totally "unexpected" need or occasion.

This year we took Dave Ramsey's Financial Peace University, and gleaned a lot of ideas and insights that have pretty much revolutionized the way we handle our finances. We learned that in spite of our mindset, we were still not living frugally. This will be the first in a series about some of the things we've learned and practical examples of how it works for us.


As a result of that course, this year we started a "Christmas Envelope," putting a little in each month since. It has been WONDERFUL to have that envelope and know exactly what our limits are and to be prepared. It has made this season much more peaceful so far, and most of our gifts are wrapped and under the tree in record time! :)


I will discuss in coming weeks the four essential things that have changed our lives in more ways than just finances:


1. A new perspective on debt and credit.


2. A zero based monthly budget.


3. What I like to call "The Envelope System"

4. A bigger than ever desire and passion for giving.


Stay tuned!

Friday, December 10, 2010

Swiff and Fluff on the Cheap!

 As we have all hard floors I had become quite a fan of the Swiffer Sweeper. I also used the Swiffer cloths for dusting. We went through them very quickly until some time ago I saw an article on the Diaper Pin about using microfiber cloths (typically sold the auto section of most department stores) in the place of disposable Swiffer sweeping cloths.

This is my most recent microfiber towel that I haven't cut yet.
While at a discount store I picked up a super cheap microfiber cloth and tried it out. It was amazing, doing exactly what the Swiffer cloth did only...it was reusable! I just shake off the excess dust over the trash can and then toss the cloth in with the dirty towels.


The microfiber cloth was a little large for my purposes so I cut it in half and did not sew the cut side to see if it would fray and after washing it for months, it has not frayed at all!

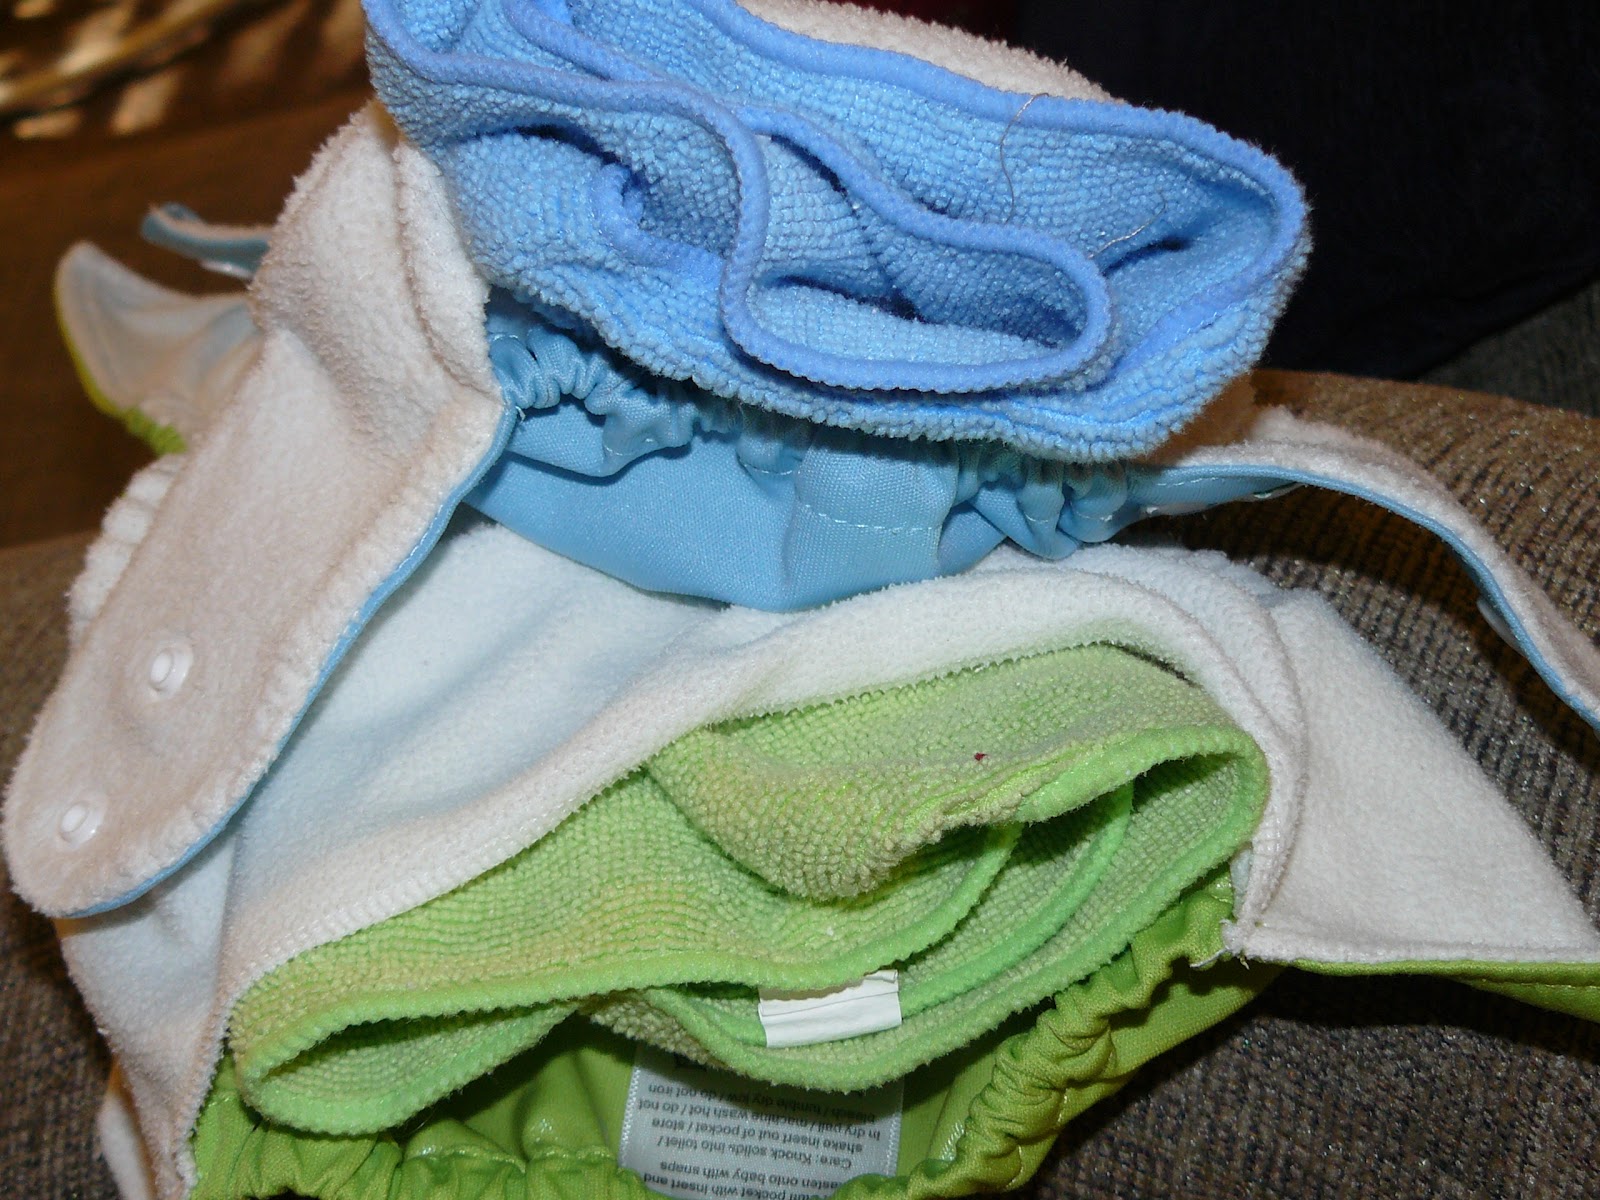
Later, I received a Nykibaby One Size pocket diaper for review from Monkey Toe Diapers that came with a microfiber towel as an insert. I discovered that it was a very absorbent and trim insert. I didn't even realize how cheap the towels were at the time, but was seriously hoping to find more to use as inserts!

I didn't have to wait long! On a recent trip to Dollar Tree and discovered that they have microfiber towels for a dollar each!


I snatched up a few white ones for dusting and sweeping and a few pastel ones for stuffing and fluffing my pocket diapers. They work SO well and are so cheap. PERFECT for adding serious extra absorbency to an overnight diaper!

And yes I did match them on purpose...pitiful I know! I also have a purple diaper and a purple cloth but it was dirty! :)


Thank you Dollar Tree!!!!!!!!!!!!!!!!!!!!!!!!!

Friday, October 15, 2010

"Guest" Post by Tom.Com: Military Showers

Just so you know, Tom is my dear husband, affectionately dubbed "Tom.Com"for his uncanny amount of knowledge about random things (I go to him before google!),  who has graciously agreed to contribute to The Cheap and Choosy with some great tips for Frugal Fridays! Without further ado...

Earlier this year, I went to Haiti with a group from our church to do some construction. The compound in which we stayed had showers that were fed from a cistern on top of another building. The cistern was expensive to fill, so we had to ration water. Thankfully, I had heard about the so-called "military" shower, but I had not done one until the week in Haiti. As the week went on, my anticipation for a long hot shower grew. And when I got home, I went to take a shower almost immediately. I turned on the water and started lathering up, but there was a check in my spirit. The water that was going down the drain was doing nothing except providing a small measure of comfort. I couldn't, in good conscience, continue wasting it, and I turned it off and finished the shower. I have continued the military shower since then, though, I must quickly admit that I have not always been quick to shut off the water after I finish rinsing.

If you have not already heard of the "military" shower, here it is:
1) Run the water long enough to get wet then shut it off.
2) Lather up with shampoo and soap.
3) Run the water long enough to rinse off.

It's a pretty simple process. It will help save on the water bill. It will help save on the gas/electric bill (depending on your hot water heater type). It has helped to continually remind me of the blessings afforded to us in this country that others don't readily have.

Sunday, September 12, 2010

Saving With Bunch Spinach {MPM}

We eat a lot of Spinach salad, mostly as an excuse to eat our yummy homemade salad dressing :). I love the health benefits of spinach too, though!

I used to buy baby spinach in a bag because it was so convenient and perfect for salad, but then I saw things on the news that were a bit disturbing about bagged salad, so I started buying bunch spinach. At first I found preparing it for salad to be a bit cumbersome, tearing the stems off by hand and tearing the leaves into bite size pieces. Finally, I had an idea that made it super easy and perfect for salad!
Before taking of the binding around the stems, I lay it on the cutting board and start slicing it, just as if it were a tomato or onion.


I slice it all the way down to the stem in about 1 inch slices, then put the stems in the back of compost stuff and the sliced leaves, which are now perfect size for salad in a colander to rinse thoroughly before saving out the amount needed for our salad that night and putting the rest in a bag in the fridge for later.


It's easy, less expensive, safer, and just as perfect for salad!


This week's menu plan:
Monday: Leftover Curry or Beirrocks
Tuesday: Empanadas
Wednesday: Chop Suey (Lentil sprouts are being grown as we speak!)
Thursday: El Burgos or Pakinstani Kima
Friday: Off to visit family for the weekend!

Thursday, August 26, 2010

A Picture Worth a Thousand Words {Frugal Friday}


We finally got our clothesline up! I already have a hard time getting everything done that I plan to, so we're not going to be "all or nothing" about this! As much as possible, I'm going to hang clothes out on the line, especially things that take the longest to dry, like towels. We'll see how it goes. Every little bit counts right? Right now I'm also looking at it as something to get me out of the house when I'm tempted to stay inside and "get things done!" And when we don't have time to hang...wool dryer balls to the rescue!! Stay tuned for a review and giveaway of some wool dryer balls during The Wool Gathering Event...oh and you fluff addicts...look close, some of that fluffy goodness are things that I'm reviewing for giveaways as well....stay tuned!

Friday, August 13, 2010

Homemade Baby Food Made Simple

When our daughter Lydia started being ready for solids, I read Super Baby Food by Ruth Yaron. It was intimidating at first, but I got tons of great ideas from it (not just for baby food but cooking from scratch in general). Yaron teaches about the now very popular method of freezing large batches of homemade baby food in ice trays. I eventually realized that though Super Baby Food goes into a lot of detail about how to make and store food and many other things, the basic concepts are not complicated. I gleaned from it a very simple regimen that has really worked for my daughter and I.

1. Whole Grain Cereal ("Super Porridge") every morning.
2. Yogurt every day at lunch.
3. Veggies or any other food baby is ready for in the evening.

This is a big over-simplification of what the book recommends, but it really helped me step back and see the big picture in order to not be overwhelmed by the details.

As Lydia had problems with constipation at first, and Yaron believed that the fact that her kids never had constipation or diarrhea was a result of their diet, I decided to give it a try.

I tried grinding the uncooked brown rice in the blender as the book recommended at first, but just couldn't get the right consistency and having to use the blender so much and so long for so little yield was stressful as the blender always upset Lydia, so I tried the other method suggested, which was just saving extra whole grain rice already cooked and blending that with a little water. This worked great but I had to make A LOT of rice to have enough left over, and we have so many recipes that call for leftover rice it was hard to make enough. It's great to do from time to time, but not as an every day thing.

Finally I realized that our overnight oatmeal in the crock pot pureed would make a GREAT whole grain cereal for Lydia, and we make a lot at a time so it was very easy to take some of that, blend it up, and store it in containers for the week. This became Lydia's breakfast and the base of her diet. As time has gone on I've started added things to it, like mashed up banana, apple sauce, pureed blueberries, or pureed mango (whatever fruit is one sale). Sometimes I give it to her plain. I often add a little commercial rice cereal because it's fortified with iron.

For lunch, Lydia has plain yogurt. Sometimes I mix in the same types of things like apple sauce or fresh pureed fruit. If she still seems hungry I'll give her some veggies or some more oatmeal. I've made her yogurt once, but for some reason I can't seem to get it together to do that consistently yet. I'm trying so many new things that I can't put but so many into regular practice at a time! We have mom's old yogurt maker to make it easy though, so I have no excuse!

For dinner for the past few months Lydia has had some sort of veggie that we've pureed and frozen in ice trays. This is so easy...just a can or two a week thrown in the blender with a touch of water and frozen in ice trays. The most common are peas, green beans, and sweet potato. We also tried mixed veggies lately (corn, carrots, peas, and green beans). I usually add commercial rice cereal to this to thicken it up and because it is fortified with iron.For the sweet potato, I usually buy 3 every week or so and bake them all one evening for a side dish for Tom and I and one to be pureed and frozen for Lydia. Usually, a couple times of week I smash up a perfectly ripe avocado and feed that to her for dinner. She loves it! Because I use the whole grain cereal and yogurt as the base of her other two meals, the amount of veggies I have to prepare is very minimal and not too time consuming. I probably puree things on an average of 2-3 times a week.

Dinners for Lydia have begun to get much more exciting in the past weeks! She can now eat almost all foods, so thanks to the Food Mill by Kid Co., she has been able to share new and exciting foods with us!The first thing we shared this way was basic curry! Then she had some Chow Mein, complete with home grown bean sprouts! Among other things we've shared Lentil Barley Stew, and this week she had some Yakisoba. I love it that my baby is already eating foods inspired by cultures all over the world! I hope it helps her appreciate a variety of foods and flavors as she grows older. My good friend Shanna makes a delicious Turkish dish that I think would be great for baby food too, so I'm hoping to try it soon!

This is basically what I have come to in my endeavor to make my own baby food, but keep it simple. None of these things are time consuming, and flow naturally with what I'm already doing. The most work outside of cooking our oatmeal, which we would do anyway, is smashing a banana or avocado, dipping out some applesauce, or pureeing a few veggies or fruits in the blender.

As for the effects on the digestive system, so far the only time Lydia has not been regular since I started this regimen is when I'd run out of yogurt and had to give her something else for lunch. The only time she's had loose stool is when I ran out of oatmeal, and fed her probably too much yogurt. So I'm with Ruth Yaron! Things seem to go along smoothly as I stick to this! ;)

The challenge has been having food to take when we go out and what to do when we run out. We haven't been buying jars, and I have had issues with getting in a pinch. I did discover that oatmeal travels great and is not messy and great for taking in the diaper bag. However, we finally decided to buy a couple of jars each week to have for back up.

Monday, August 2, 2010

Crock Pot Granola, Free Cookbook, and Menu Plan Monday

We stopped buying boxed cereal a few months ago, to save money and improve the quality of our breakfasts. We usually have overnight steel cut oatmeal in the crockpot, or homemade granola. Granola is really easy to make, and you can throw in whatever you have. Most recipes call for different nuts, maybe dried coconut flakes, or wheat germ or dried fruit. All these ingredients are optional. That makes it simple and economical. As long as you have oil, honey, and oats, you're good to go. I try to keep some other things in stock, but it's nice to know they're not necessary for tasty cereal!

I've been trying out different granola recipes and methods for months. I've burnt a lot of rolled oats over that time too! I've found it difficult to get perfect granola, though fortunately somewhat burned, it still tastes yummy. A few weeks ago I had an email in my inbox with a free cookbook called Molly Fresh. It has lots of great fresh recipes for summer, including homemade pesto, which my husband made again this weekend!

The thing that caught my attention was a recipe for making granola in the crock pot. I'd never thought of this, so I decided to try it. I've been doing it about twice a week since! Yes, again I've burnt plenty of it, but I finally learned that as long as I set a timer to stir every 15 minutes or so, it turns out great! I like it because I can make granola in the summer without heating up the house with the oven. I hate reaching into the oven to stir or pulling dishes in and out to stir, which you have to do more often in the oven.

Here's the recipe and a sample of the free cookbook
(click to enlarge) that you can download here.
Some tips:
-I add 1/4 cup of brown sugar. (Hee hee ;)
-It says here to cook it for 5 hours. Every crock pot is different. The first time just stay near it and stop cooking and stirring once it gets to the desired consistency.
-I found it helpful to leave the lid on the crock pot cracked a little.
-Stir often the first time. My crock pot on low is pretty hot. I left it too long the first time (and a couple other times that I forgot about it!)
-Once I accidentally put double the oil and honey. It made a great chewy snack, kind of like granola bars!


Now for this weeks menu plan. I'm veering a little from More with Less. Don't worry. I'm not finished being obsessed with that amazing cookbook. I just wanted to use up some stuff we have this week and try to go all homemade on an old favorite recipe. I just might share it next week if it works out!


Monday: Homemade Pizza
Tuesday: Baked Chicken (not sure of the specifics yet)
Wednesday: Chicken Crescent rolls (with leftover chicken)
Thursday: Homemade Spaghetti
Friday: Chicken Curry (with leftover chicken)
Saturday: Leftovers
Sunday: Vietnam Fried Rice

Thursday, July 29, 2010

Toiletry Tips Part Three: Adios Facial Scrub!

A couple of week ago I shared about no longer using shampoo, but washing my hair with baking soda and vinegar instead.


Well, we ran out of Aveeno face scrub around that time, and I've been debating about whether to replace it or not ever since. I was really questioning the necessity of special face cleaners. Then one day this week as I was washing my hair with baking soda, I remembered I thought about its abrasive quality. I already use it for scrubbing the sink, pots and pans, and even the bathtub.

I thought I'd try it on my face, not rubbing too hard or too long of course. The results were great! My skin felt so smooth and fresh. I looked it up to find it's a common practice. I did see a couple of people saying it burned if you have an open sore, but I think that would be true for just about anything!

I'm not sure it's best to use any kind of scrub on your face everyday, even though I do it, and I'm sure you should rub very gently, but I can find nothing, on line at least, that gives reason not to do it! This will save money and unnecessary packaging waste!


Scratch face scrub off my list! It's getting shorter by the week!


Find more frugal tips at Life as Mom's Frugal Friday!

Friday, June 25, 2010

Perfectly Ripe Avocado-No More Waste!

You may be an expert at being able to tell just by the feel when an avocado is perfectly ripe. I am not. I wasted so many avocados by cutting them open too late or too early that I almost quit buying them altogether. Fortunatley it occurred to me to consult an expert about it. I finally asked one of my dear friends from Mexico how she knew when an avocado was truly ready to use. Her secret has worked for me every time. Here it is:

Buy the avocado when it is green. (I call it "crayon green.") Wrap the avocado in a towel or paper towel and set it in a dark place that will be room temperature. I put them on the counter under the cabinet. Leave the avocado there for 2 full days. At the end of 2 days or on the 3rd day...GUACAMOLE! You have a perfectly ready to cut and serve avocado.

I know there are other methods that work, but this has been my favorite. I've personally found it to be the least subjective and most effective.


***Baby Food Tip: Mash one of these up for a SUPER quick, SUPER easy, SUPER nutricious baby meal!***

Sunday, June 20, 2010

Review and GIVEAWAY- More with Less!*CLOSED*


I had already started down the road of wanting to live frugally and simply, and had just begun to scratch the surface of cutting out some processed foods. It had bothered me that most recipes I used involved some premade product or another. What if we moved to another country and there was no Pillsbury? What would I do then? I think that deep inside, I did not enjoy cooking was because I didn't feel good about what I was cooking. I wanted to learn to really cook but didn't know where to begin.

Enter More with Less, A World Community Cookbook by Doris Janzen Longacre. This cookbook has revolutionized my cooking and grocery shopping in a matter of weeks! What makes this cookbook so unique?

First released in 1976 and again in 2000 as an anniversary edition, this book is a collection of Mennonite recipes from all over the world answering to a call to respond to world food shortages by using the earth's limited resources more responsibly. The premise is that North Americans typically overeat protein (especially meat), sugar and processed foods. It recommends consuming smaller quantities of meat, and that "combinations of grains and dairy products or grains and legumes form complete protein." In the introduction Longacre also discusses our responsibility and the role of faith in responding to world need as well as tips on how to build a simpler diet.

What I love about this cookbook:

1. All the recipes are simple, but from scratch. In other words, it makes cooking from scratch simple!

2. All the recipes are tested, and it shows! The recipes we've tried so far have turned out every time (except for a couple of errors on the part of the cook ;).

3. It proves that simple and inexpensive does not have to equal tasteless or unhealthy. All the recipes I've tried so far have come out very tasty!

4. It is multicultural, yet still simple and almost all of the recipes involve easy to find ingredients and things we typically already have around.

5. Our spending on groceries has gone down significantly, and the shopping list has become much simpler.

6. Many of the recipes call for 1 or 2 cups of meat. We have started freezing our meat in one cup portions. This has really stretched our meat out and helped us have what we need on hand.

7. Since everything is from scratch, I'm learning the basics of cooking and already starting to experiment on my own.

What I don't like about the cookbook:

1. The only thing that I can think of is that some recipes call for sausage or just plain pork, which we do not eat much of. However, in all of those cases that I've seen so far, it can be substituted with ground beef or chicken and in many cases it can be completely omitted.

All in all, if you want to simplify your grocery list, cut down on your grocery spending, eat less processed foods and learn to cook just about anything from scratch, THIS IS THE BOOK FOR YOU!

This cookbook correlates with the inspiration of this new blog as it assists in frugal, healthy, and simple living. I'm giving away one copy a way as a "kick off" for The Cheap and Choosy!

HOW TO WIN IT:

One Mandatory Entry: Simply leave a comment telling me what interests you about this cookbook.

Leave your email in the comment if it is not clearly posted on your blogger profile if you have one. You do not have to be a blogger to enter this giveaway! You just have to have a valid email address!

For Additional Entries:

1. Follow me on Google Friend Connect (right hand sidebar) and leave me a comment letting me know that you did.

2. Follow me on Twitter and leave me a comment to let me know that you did.

3. Tweet about this giveaway, including a link to this post, and leave me a comment letting me know you did. Please include the permalink of your tweet in the comment! (If you're not sure how to get the link, check out My New Life As a Mom's tutorial here.)

***You may tweet about this giveaway as many times as you want for the duration of this giveaway for an extra entry each time. Just leave a comment with the link each time!***

4. Subscribe to The Cheap and Choosy via email (right hand sidebar) and leave me a comment letting me know you did.

4. Email a friend who you think my be interested about this giveaway and CC it to me at cheapnchoosy@gmail.com, and leave a comment letting me know you did. (This will earn 3 entries! Just be sure to leave me separate 3 comments letting me know you did it.)

5. Blog about this giveaway and leave me a comment with the link to your post.
(This will earn 5 entries. Just be sure to leave 5 comments letting me know you did it!)

U.S. and Canada only. This giveaway is open until Monday July, 12 at 11:59pm EDT. The winner will be chosen using a random number generator. I will email the winner, who will have 48 hours to respond. If winner does not respond within 48 hours, another winner will be chosen. I will post the winner when the selection has been made and confirmed by the recipient.

I am conducting this review and giveaway because I have found this book personally enriching and want to share it. The copy I reviewed and the copy for giveaway are purchased by myself personally. No compensation is being received by me or any other person as a result of this review and giveaway.

Friday, June 18, 2010

Overnight Oatmeal {Soaked Steel Cut Oatmeal}

*Update  as of July, 2012: We still enjoy steel cut oats for breakfast, and it still starts the evening before, but we have found that leaving them on warm in the crock pot overnight is actually a breeding ground for bacteria. We'd been doing it for two years before it ever made us sick. Now we soak two cups of oats with 1.5 TB of vinegar overnight, drain and rinse in the morning, add 3 cups of water again and cook until the desired consistency is obtained. This is safer and more nutritious! You can read why we do it this way here.*

We have for the most part stopped buying prepared cereals (except this week we couldn't resist the two boxes of Chex we got for $.25). I'm trying to make Granola on a regular basis, and our easy homemade bread makes delicious toast. However, the main thing that keeps us having a healthy breakfast on the cheap and with ease is making large quantities of oatmeal overnight in the crock pot about once a week.

There are many opinions about how this is best done. Just Google it and you'll find out. Everyone has a different idea of what the perfect consistency of oatmeal is, and there are many varieties of crock pots. I will share what works for our tastes and our pot! A lot of people put the oatmeal in a bowl inside the crock pot, but ours is too small to make more than an individual serving that way. The reason for doing that however, is that the oatmeal can overcook and get crusty overnight. We don't have that problem with the following method:

Overnight Oatmeal in the Crock Pot:

We use 4 cups of water to 1 cup of steel cut oats. We usually make 2 cups of oats at a time so that we can have leftovers for the week. (I buy steel cut oats by the pound at Whole Foods at $1.15/lb)

1. Heat 8 cups of water to boiling in our electric kettle, and pour it over the 2 cups of oats mixed with a dash of salt in the crock pot and close the lid.

2. We turn the crock pot on "warm". "Low" is not the same. This is key. It's not really cooking, just staying on warm. If your crock pot doesn't have this setting this method may not work for you.

3. Leave overnight and by morning the water is mostly absorbed. It will be a tad soupy, but we like this because otherwise when we reheat it during the week it will be too thick. We scoop out our portions and microwave it a bit if we want it a little thicker and then refrigerate the rest in individual size portions.

Don't have a crock pot?

Overnight Oatmeal on the Stove Top

1. Toast the two cups of steel cut oats in the bottom of large pot (optional), and mix in a dash of salt.

2. Pour 7-8 cups of boiling water over the oats, OR pour in 7-8 cups of water and bring to a boil.

3. Cover with lid and let sit overnight.

4. In the morning, turn on medium heat and let oatmeal cook until it has reached the desired consistency.

Wednesday, June 16, 2010

Homemade Reusable Sandwich Bags

*Update: After initially writing this post I started making these with water resistant ripstop nylon on the inside. It is more food safe and much lighter for an all together better result! I currently use ripstop nylon to make super compact travel diaper changing pads for sale in my Etsy shop, Seams to Streams.*


When I learned of the existence of reusable sandwich bags, I went googling to see what it was all about. I found this blog with a very user friendly tutorial on how to make reusable snack bags yourself. I saw elsewhere (can't remember where), that someone had made a sandwich wrap, but lined it material from a vinyl table cloth instead of PUL.

We had a vinyl tablecloth I was getting ready to get rid of! I preferred the sandwich bag idea over a wrap, so I combined the two ideas. I also had a couple of big pretty cloth napkins that had been given to me for sewing, so I used those as the outer fabric.

How to Make Reusable Sandwich Bags

1. First, I cut equal sized rectangles of fabric and tablecloth. I used an actual sandwich bag for sizing, so that folded in half the rectangles were 1 or 2 inches bigger than a sandwich bag:


2. Next, I placed the two rectangles with the pretty sides in and sewed them together at the ends. Just two straight lines! :)


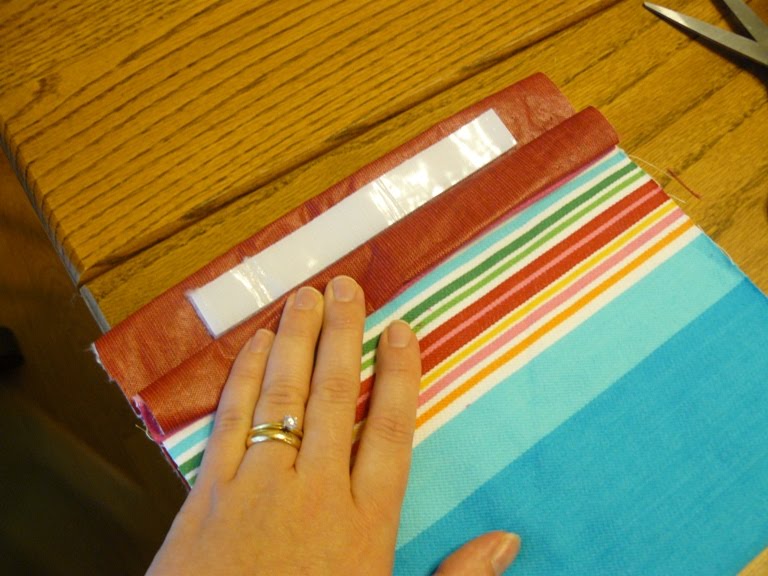
3. Next, I turned the sewn together rectangles so that the fronts were facing out, and put a strip of velcro on the vinyl side, leaving room on the edges for sewing together later. In order to place the velcro accurately without bothering with too much measuring, I went ahead and stuck an equal size piece of velcro right onto the piece I'd already stuck. Than I could fold the material and just unpeel and stick the other side on.


4. I folded the rectangle with the vinyl/velcro side out (inside out), and sewed the two sides together. Just two more straight lines! :)


5. I turned it back, and the job was close to done, but something had to be done about that inner seam if I was going to carry a peanut butter sandwich in this!


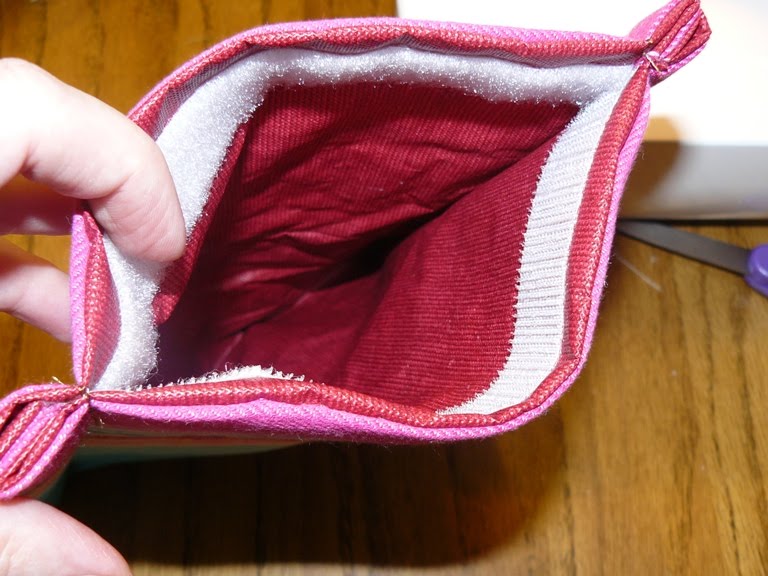
6. So finally I sewed just two more straight lines down the sides with the bag turned right side out to enclose those seams. Here is the final product from the outside:

And from the inside:You can see it is the same size between the seams as a regular sandwich bag:


Just wipe and reuse!I've already tried it. It works great! Of course, you cannot put really hot things in there or heat it.

This has inspired quite a few more "reusable" ideas that I CAN'T WAIT to try! I'll keep you posted. I also found some beautiful "vintagey" fabric at a consignment store that I plan to make more of these with.