Showing posts with label cooking from scratch. Show all posts

Tuesday, May 1, 2012

Fresh Herbs for the Thoughtless Gardener


Contributed by Anna of Not Knowing Where

Have you ever noticed that many "healthy" recipes look just like your grandmother's recipe, except they call for things like fat-free cheese or egg substitute? When people tell me eating healthy is too expensive, I wonder if it's because they're reading recipes that call for specialty versions of high calorie food - like fat free butter or sugar-free honey.

When I was in college, my grandmother gave me a cookbook that has been a mainstay on my shelf for 15 years. It's a health food book with virtually no substitutes, just good healthy food plus herbs and spicesIt taught me that the secret to great cooking is not more butter or mayonnaise, but more guiltless, honest flavor. 

Eight years ago, I started an herb garden outside my front door. Over the course of a few years, I planted just about everything I liked to cook with, just to see what happened. Freshly picked herbs are incredible!

But here's the thing - I'm a horrible gardener. Maybe half my sprouts survived a season. Very few took hold in the long run. So anything that survived did so despite me, and certainly not because of me. In a strange way, that makes me feel uniquely qualified to make herb garden suggestions. I am here to tell you what herbs to grow that are insanely delicious, and yet have great resilience to the thoughtless gardener.

The ones that make the cut here survived multiple years under my care (or lack thereof). I asked my husband, the gifted gardener, to proof this post and make suggestions. In addition to some careful corrections, he made multiple suggestions of herbs to add. To which I mostly responded, "Nope, I killed that... Can't do that one; I killed it twice... etc." This is not a comprehensive list of herbs that gifted gardeners consider to be easy, but only the humble opinion of one who struggles. Sometimes I feel like too many bloggers only talk about what they are insanely good at. However I'm silly enough to post about my weaknesses, on this, my first contribution to The Cheap and Choosy. Am I crazy? Probably. But here goes!

Mediterranean spices: Rosemary and Culinary Sage
The Mediterranean climate has a rainy season and a dry season. In other words, you can be like me and totally forget to water your sage, then follow this neglect with a period of avidly watering it every day, and then go back to forgetting about it completely. Rosemary, once established, almost never needs to be watered if you live somewhere that experiences periodic rain. The culinary sage gets periodically stressed, but so far has always bounced back. The sage's only problem is bugs. Our rosemary (that I planted!) is large enough to take over the world. Rosemary and sage are both perennials in many zones.

Italian Spices: Oregano and Basil
Oregano will die off to a pile of twigs in the winter, but then generate new growth the next spring. Be warned, there are many varieties of oregano, and they don't all taste awesome. Make sure you know what you're getting, because you will have it forever. Basil is not a perennial in most zones, however it is prolific while it grows. I once decided to hack off the entire plant at its base in June because I was going to travel, and there was no one to water it. When I returned from my trip, it had started growing back. This trick seems to only work in the early summer. If you wait too long, then it will take the hint and die. 

Garlic
I find garlic to be particularly miraculous. In October, go to the store and buy a few bulbs of garlic from the produce section. Divide it into cloves, and bury each one outside. Water it periodically until the weather starts to freeze. Then do nothing until the following spring. If you like spring garlic, then you can pull some up early to eat. In this case, you eat the entire spring garlic plant. If you want full, mature bulbs, then you wait through the summer until the stalk is almost completely dead. Dig up the bulbs, and you have a year's supply of garlic. Store them in a dry place.

Now is a great time to start planting herbs in your yard! Transplants are often best, as many herbs propagate better from cuttings than from seed. Potted herbs can be tempting because there is less weeding involved. However my experience has been that there is no substitute for the plant being in fertile ground. Potted plants dry out faster and do not over winter well for the thoughtless garden. 

The gardening husband insists that there are many more easy-to-grow herbs. Please share your experience if you have a favorite, hearty herb or spice in your yard. The Cheap and Choosy would love to hear your story. 

Friday, February 25, 2011

Homemade Yogurt in the Crock Pot!

Boy, have I learned a lot in the past 48 hours or so! First of all, I've been back and forth about whether to bother making my own yogurt or not because all the recipes that I could find that were supposed to be "easy" did not look so "easy" to me! Why? Because checking the temperature and keeping it just right for hours is something that this "global" mom would never be able to stay on top of. Yes, I always have multiple things going on at once but that level of attention to detail is beyond my ability and makes me nervous! I would have to stand there the whole time. I would never remember to check otherwise. I know that you can get a system down with trial and error and find a way to incubate yogurt without having to check, but I was dreading the trial and error and all the potential waste of milk and time in the process. I even have my mom's old yogurt maker that works really well, but we go through it SO FAST that I would have to make it so often since that makes a pretty small batch compared to what we use.

I saw a recipe once for making yogurt in the crock pot, but so many of the comments were negative, saying that it had come out runny, that it discouraged me. I lost my motivation.

Until this week. The fact that we go through yogurt so fast had gotten me thinking about really doing this some way in which I can make bigger batches.

Then I discovered, "A Year of Slow Cooking." I know, I know, I'm way behind the times, but I'm SO excited! That blog will become one of the three cookbooks I'll be using for a year starting in April. (I'll share the other two in a later post.) Stephanie's enthusiasm and results along with the many positive results shared in the comments motivated to try this, and as she would say, "It works! It really really works!"

My daughter and I enjoyed the tastiest most perfectly textured yogurt today that I have had in a long long time...if ever!!!!!!!!! THANK YOU STEPHANIE! My fingers aren't quite shaking, but I'm very very excited, which is why I'm writing this post right now when I should be doing a lot of other things!

I won't repeat all of Stephanie's recipe, you can just check it out here. I will describe how I "sorta kinda" adapted it.

1. I heated a half gallon of whole milk on low fro 2.5 hours as the recipe called for.

2. The next step was to unplug it and let it sit for three hours. I didn't exactly follow this because I have the thermometer that goes with my mom's old yogurt machine that is perfect for global folks like me and doesn't even have numbers! It just has an arrow signaling, "When the temperature is here, mix in the starter!"  Love it!

Therefore, I took off the lid and let it sit a while and checked a couple of times...not sure how much time went by, I think it was about an hour, but the temperature was just right the second time, so I scooped out two cups of it into a separate bowl and mixed in a half cup of store bought yogurt.

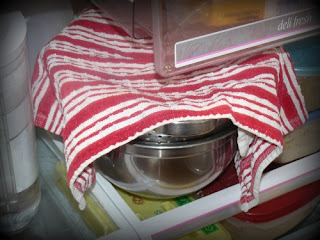
3. Then, since I knew it was at the perfect temperature, I put the lid on the pot and wrapped that sucker in TWO HUGE towels as airtight as I possibly could, because I knew it needed to not get any cooler.

4. Then I just forgot about it. The this morning, around 7:30, I remembered. I hadn't been in the kitchen yet because my dear husband brings me a mug of coffee as I stagger to a chair in the living room in the mornings where I remain with my coffee until Lydia wakes up and/or I remember that yogurt is incubating on the counter! For this reason, it was incubating for about 12 hours. I'd meant to leave it for only 10.

When I opened it up I saw clumpy yogurt with liquid separating it a little. I was excited because I knew this meant "not soupy." Yay! This was after stirring a tad:
 

This is where I reveal what a rookie I am, but it wasn't until yesterday that I learned that you call that "liquid" whey. I had tried to print out Stephanie's post, forgetting there were 400+ comments, and needless to say, it ran out of paper before even finishing the comments. I did scan the comments and that is where I learned what whey was and that you could use it for other things, like baking bread.

I did a quick search on uses of whey and got some great information really quickly. I knew I wanted to get some of that whey out for a bit thicker consistency of yogurt, so first I tried using our coffee sieve and scooping out a bit at a time and letting the whey drip off. I quickly learned that this was not going to work.


I thought I needed cheese cloth but I tried using one of our buffet style cloth napkins that we use as kitchen cloth because it is thin. I wet it, wrung it out, and laid it in a colander which I sat on a bowl. I emptied the crock pot of yogurt into the colander and sat it in the fridge for an hour or two. I know that's a broad range, but that's just how I work.


I was so excited when I pulled it out. The yogurt was just right, and I had about 2 cups of whey. Exactly the amount that I needed to substitute whey for water in my easy homemade bread recipe (which I'll be posting some tips on soon).  I learned from my earlier search that using it instead of water to prep the yeast would make the bread moister and add some protein. I'm excited about all of the potential uses of whey, a great list of which you can find in this discussion on Chow Hound. It led me on a search about how to make mozzarella cheese, which I might just try after our trip to Brazil!


So finally I had a big bowl of yogurt in the fridge and a nice bit of whey on top waiting for the bread baking, which happened to be today since we just ran out.


I was distracted and left out a couple of important steps in the bread making and we were short on yeast. It's cooling now, but I don't expect the results to be stellar. I will try again and let you know how it turns out!

All in all, I can see this EASILY becoming a weekly routine! Set milk in the crock pot  on low for a couple of hours around dinner time. Take the lid off and let it cool, keep check, but it should be ready in an hour or so to mix in a tad of last weeks yogurt. Then wrap it up in two towels and forget about it until the next morning. Save the whey and make bread for the week as well. LOVE IT!!!!!!!!!!!!!!!!!!!!!!!!!!!!!

Scratch yogurt off my grocery list! Woo Hoo!!!!

Tuesday, February 15, 2011

A 'More With Less' Valentine

Both my daughter and I are dealing with pretty bad colds, and were unable to go anywhere on Valentines day. My hubby and I aren't really big holiday people in that we don't think about them very well in advance. We love giving gifts and cards but tend to enjoy it more spontaneously than due to established holidays. For that reason and because Lydia and I have been sick, we had no plans, no cards, no gifts, 'no nothin' for Valentines day.

I had a surge of energy before Tom came home for lunch and wanted to make him something sweet. The cupboards are pretty bare as it's time to re-stock on some essentials, but thanks to More With Less cookbook, I was able to throw together  a couple of sweet (but not too sweet) treats.


 The first was "Date Oatmeal Cookies" on page 286. We don't keep dates around, but we did have some raisins and made them Oatmeal Raisin Cookies. We had all the essential ingredients and they came out yummy. At first they were looking questionable when I peaked into the oven so I made a back-up of some "No-bake Cereal Cookies" on page 287 with rolled oats in place of the dried flake cereal.

I made two very last minute cards with card-stock and crayons. One for Lydia to scribble on and one from me. Lydia's got taped to the door for Daddy's (aka "dah tee") arrival. It was the first time she'd held a crayon or scribbled! Double special!


It was simple and fun and didn't' require buying anything we didn't have! Thank you More With Less!!!!


Friday, January 14, 2011

Homemade Ranch Dressing: Good News for the Tastebuds, Not so Good for the Waistline

Do you love Ranch dressing, but would like to know what's IN your Ranch? You can make your own just about as quickly as you can whip up a batch out of a pre-prepared packet!

Some time back, I posted about my deliverance from my Ranch dressing addiction brought about by an equally yummy homemade olive oil and garlic salad dressing. That was all well and good until recently.

We had baked chicken the other day, which made me really crave some Ranch because I LOVE it for dipping baked chicken in. I decided to look on line and see if there was a recipe for homemade Ranch. I was doubtful, but my husband told me that there was. He follows Hallee Homemaker's blog and had seen it there.

I went and found it and within 10 or 15 minutes, had a cup of the most delicious Ranch Dressing I'd ever tasted! That's how quick and easy it is, and yes that means you don't need fancy ingredients because obviously we already had everything needed!


I couldn't believe it was that simple. Now I'm really happy because if God ever calls us to another country, I can make Ranch Dressing! I've already shared it with one friend living overseas and plan to share it with more. That is so exciting to me. Yay!

 Here's the recipe:

⅓ cup mayonnaise
⅓ cup plain yogurt (or sour cream)
⅓ cup buttermilk (I just use whole milk because that is what we keep around)
¼ tsp salt
¼ tsp fresh ground black pepper
¼ tsp garlic powder
¼ tsp onion powder
½ tsp dried parsley flakes
½ tsp dried dill

Stir it together and store in whatever you please. Chill and serve on whatever you fancy. :)

Yum!

Tuesday, January 4, 2011

Homemade Macaroni and Cheese on the Stovetop


 *Disclaimer: I realize this is nothing new to the rest of the world, but please humor me. I began this blog originally by logging my experiences in learning to make things myself that I was used to buying pre-made. It's a little challenge I've been enjoying. Please don't think badly of my mother. I wasn't the least interested in these things as a kid and didn't pay attention. It's not her fault! :)
 
 I spend time with my friend Rachel on Thursdays, and the last time I was there, she made some mac' n cheese with...you won't believe it...CHEESE! I was pretty excited because I hadn't seen it done that way, that I *remember.*

Yet again, I was surprised to learn how to make something simple from scratch that I'd only ever known to come out of a box. I must say, my mom did make homemade macaroni and cheese when I was a kid, but it was in the form of a casserole, and I never thought of it as an option for a quick, stove top meal.


I haven't got measurements because she just eye balled it, and so did I. It's pretty hard to go wrong.

1. Start about 2 cups? of macaroni noodles boiling.
2. In a saucepan, melt 2 or 3 tablespoons of butter.
3. Add about 2 cups of shredded cheddar cheese.
4. Stir in "a little" milk (sorry for the vagueness.)
5. Continue cooking and stirring on medium low heat until blended.


6. When I realized I was just making a white sauce with cheese, I added a tablespoon of flour to thicken it a little.

7. When noodles are done, strain them and then mix them into the sauce.


This is where the "choosy" wins out over the "cheap," because cheese is expensive. That's why I'll just make this every once in a while. I'm not at all opposed to a good ol' box of Kraft Mac n' Cheese every now and then either. I'm just glad to know I can do it myself. This way a comfort food becomes a healthy food...relatively speaking.;)

Scratch boxed Mac n' Cheese off my grocery list!

Monday, December 6, 2010

Easy Improv: Creamy Italian Chicken


I've mentioned before that one of the most helpful things I've learned from More With Less cookbook is how to make a simple white sauce, thick enough replace condensed cream of ____ soup, or thin enough to be soup. We have chopped chicken frozen in one cup portions in the freezer and I was feeling like something creamy. We also had macaroni noodles. In the past, a craving of creamy pasta led to the opening of a box of Pasta Roni! But now that I know how easy white sauce is, that didn't even occur to me!

I'm pretty excited because this "throw together" meal ended up being a new recipe! The impulsive tossing in of slivered almonds really set it off! This is huge because I am not a cook. I've been learning to cook, and using More With Less as my guide since it's simple and from scratch.

As a matter of fact, I'm pretty sure this is my FIRST "original" recipe! (Though influenced inspired by similar things in More With Less.)

My new recipe is hereby dubbed:
"Creamy Italian Chicken"


 Here's how to make it:

1. Put water for pasta to boil and continue with recipe, but add pasta and boil when ready.
2. Melt 2 TB of butter in a saucepan.
3. Add a crushed garlic clove, 1/2 tsp of salt, and basil and oregano as much as desired.
4. Stir in 2 TB of flour until it's all mixed.
5. Stirring with a wisk, add about 2 cups of milk.
6. Keep stirring at medium heat until thickened. (You can add milk if you want it thinner.)
7. Add 1 cup of chopped or pulled chicken.
8. Add a half cup or so of slivered almonds.
9. Drain Pasta and put in serving dish or dishes.
10. Top Pasta with chicken mixture.
11. Garnish with dried Parsley and/or slivered almonds.


I used to be a Pasta Roni Aholic!  But now... who needs it???? Seriously, this was just as easy to prepare, and much better!

 Scratch Pasta Roni off my grocery list forever!!!!!!!!!! ( I told you there would be more :)

(It's been a while so if you're new here you can click on my "cooking from scratch," and/or "simplifying" button on the left to see more things I've enjoyed scratching off the list!)

Monday, November 22, 2010

In the Kitchen this Week: A Work In Progress


Lately I have not been posting much about learning to cook since I took on quite more than I could handle with review and giveaway events. I had no idea how challenging that would be since I started planning for it when Lydia was sleeping and eating the majority of the time.  That was quite a few months ago. Around that time I also had begun learning to cook from scratch. I was excited about finding ways to simplify our grocery list and eat more naturally, and that is what got me motivated about cooking, along with the timely purchase of  More With Less Cookbook.

I'm looking forward to focusing on cooking again in the coming year. I am continuing to plug my way through More With Less Cookbook, and plan to continue to do so until I have found all of our favorites and have made them enough for it to be second nature.


Here are a few random things I've learned along the journey so far:

~ Yogurt is a perfect substitute for sour cream. Really. I know it doesn't seem like it would work on a taco but it totally does, and it's healthier too!

~ Salt really brings out flavor...try adding a bit more salt before adding anything else.

~ Freezing meat in one cup portions majorly stretches your meat supply and your budget. It also makes cooking simpler. More With Less has a lot of recipes that you can used chopped chicken, ground beef, or any left over meat that are very tasty.

~Homemade pizza sauce and spaghetti sauce are both easy to make. We no longer keep Ragu and Papa John's in business.

~We don't keep Pillsbury in business anymore either since biscuit dough turns out to be easy to make and can be used in my all time favorite recipe in place of Pillsbury Crescent Rolls.

~Bread crumbs are really easy to make yourself...just save the heels or any bread that got a little too dry but hasn't gone bad in the freezer and when you have enough, toast it at about 250 degrees until it's hard all the way through...crush or process in a blender or food processor. For Italian flavored crumbs, add garlic powder, salt, sugar, onion powder, basil, and oregano. (I add a teaspoon of each of those per approximate cup of crumbs).

~We no longer keep whatever company has the best coupons out for Ranch dressing in business either since we discovered a simple but DELICIOUS oil, vinegar, and garlic homemade salad dressing recipe.

~No more Cream of {Whatever} soup for us! A basic white sauce at the right thickness provides the perfect substitute...add chicken stock for cream of chicken and the possibilities are endless!

~Kellogg's, General Mills and whatever other producers of boxed cereal no longer have our business either since it's overnight steel cut oatmeal in the crock-pot, homemade granola, or eggs and toast for us in the mornings!

~You can grow lentil sprouts on your counter, and they work great in stir fried dishes.


Things I really need to work on are:

~Learning to make some easy healthy snacks.

~Storing homemade bread without it drying out.

~Dealing methodically with the bigger mess and increased amount of dirty dishes that cooking this way creates.

~Remembering to start things ahead of time that need to be chilled, sprouted, etc.

~Chopping up vegetables that I know I'll need ahead of time and storing them in the freezer/fridge accordingly.

~Some simple but tasty vegetable side dishes. (Trying to incorporate a few that sound yummy this week.)

~Figuring out what I'm doing wrong when I try to make tortillas!

~Making realistic menu plans... :)
 

*Image Credit: The Graphics Fairy
 

Monday, September 6, 2010

So Long,Pillsbury! {Menu Plan Monday}


By the time I finish this post it may become "Menu Plan Tuesday" as I'm busy trying to adjust to life with a crawler and no more morning nap (unless it's just the teething).

I will continue with Menu Plan Monday, because my family needs to eat, and it provides a motivation and accountability to sit down and plan out meals and make a grocery list accordingly. This prevents a ton of stress for the rest of the week. Otherwise, you would find me around 5:00 or 5:30 p.m. with my usually by then tired baby (and all that that implies), scratching my head, looking into the fridge and pantry asking myself, "What in the world am I going to cook for dinner?" Then, hubby would come home to a frazzled frustrated wife and no hope of dinner anytime soon. He's so sweet that he would not complain or criticize, but I'd be frustrated and as we all know, that's not a fun state to be in.

Oh and about that grocery list made according to my menu plan...have I mentioned that my grocery list is SOOOO simple thanks to More With Less Cookbook? The simple list of things we get weekly or bi-weekly covers many many recipes in the book. At most I get one or two things a week that I buy with one specific recipe in mind, and usually can use it for a few other recipes too. The rest are staples that go in a variety of recipes...and did I mention that they're mostly low cost ingredients as well? Just Sayin'...

I believe I have mentioned that before More With Less, I could barely cook. That is not entirely true, but my list of recipes that I felt confident about was very short, ie maybe 4, and most of them, if not all, involved some pre-made food or another as a main ingredient.

One of the recipes that I loved and served to everyone who came over for dinner at some point (sorry friends if you had it twice...or..thrice...or...yikes!) is affectionately known to us as "Chicken Crescent Rolls" or to our Spanish or rather Spanglish speaking friends as "Bolitas de Chicken."

It was passed on from a family friend, and may have originally come from the back of some some Pillsbury product or another because the essential ingredient was Pillsbury Crescent Rolls.

Do you know that it never occurred to me that I could make the dough myself? I remember thinking many times, "What would I do if we moved to another country? I wouldn't be able to get Pillsbury Crescent Rolls!" It's sad I know, but it's the truth.

Then one day, I was looking through...you'll never guess....More With Less Cookbook, and I found a recipe that looked very similar to my beloved Chicken Crescent Rolls, except...wait a minute...you use biscuit dough? Don't tell me they're just basic biscuit dough! But, sure enough, that turns out to be the case and I realized that you don't need some fancy recipe or ingredients.

So, I finally got around to trying Chicken Not Crescent Rolls without buying refrigerated dough! And guess what? It was easy! I spent about 5 minutes making the dough and maybe 2 extra minutes rolling it out. I dirtied about 2 more dishes, and felt no worse for the wear.

Here are some way overly processed pictures of the experience. I got a little carried away with Picnik. (It's so much fun!) The food may be less processed but the pictures definitely are not!

Here's the ball of dough I prepared first and put in a bowl in the fridge while I got everything else ready.


While doing this I had some chicken boiling, and then chopped it up. I used about 4 breasts. I was going to save some aside to freeze in 1 cup portions for other recipes, but forgot. So we ended up with LOTS of chicken balls!


Then I mixed in half a bar of cream cheese, a dash of salt, a dash of pepper, and a bunch of dried oregano and basil


Next I rolled out the dough and used a mug to cut circles. We don't have cookie cutters so I always use cups or bowls. They work great and offer a pretty good variety of size options! Yay for things you don't really need!!!


Then I grabbed a ball of the chicken mix and placed it in the middle of one of the discs of dough and wrapped it up. I found it actually easier to work with and stretch around the chicken than the refrigerated dough! In the background you can see the bowl of melted butter and the bowl of homemade italian breadcrumbs that I roll the ball in once it is formed.


Finally I ended up with two 9x9 baking dishes full of these yummy things.


With the store bought dough, you cook it for 25 minutes. I found that these needed a bit longer. I forgot to set the timer so I'm not sure how long. We just went based on the look. Next time I'll start with 30 min. and go from there.

So, Scratch Pillsbury Crescent Rolls off my list...FOREVER! Yay!

This week.....

Monday: Chick Fillet :)
Tuesday: Homemade Pizza
Wednesday: Pakistani Kima (pg. 131, More With Less) (We tried this last week...Y.U.M. and really quick!)
Thursday: Beirrocks (pg. 144, More With Less)
Friday: Lentil Barley Stew (pg. 107 More With Less)
Saturday: El Burgos (pg. 138 More With Less)

Friday, August 13, 2010

Homemade Baby Food Made Simple

When our daughter Lydia started being ready for solids, I read Super Baby Food by Ruth Yaron. It was intimidating at first, but I got tons of great ideas from it (not just for baby food but cooking from scratch in general). Yaron teaches about the now very popular method of freezing large batches of homemade baby food in ice trays. I eventually realized that though Super Baby Food goes into a lot of detail about how to make and store food and many other things, the basic concepts are not complicated. I gleaned from it a very simple regimen that has really worked for my daughter and I.

1. Whole Grain Cereal ("Super Porridge") every morning.
2. Yogurt every day at lunch.
3. Veggies or any other food baby is ready for in the evening.

This is a big over-simplification of what the book recommends, but it really helped me step back and see the big picture in order to not be overwhelmed by the details.

As Lydia had problems with constipation at first, and Yaron believed that the fact that her kids never had constipation or diarrhea was a result of their diet, I decided to give it a try.

I tried grinding the uncooked brown rice in the blender as the book recommended at first, but just couldn't get the right consistency and having to use the blender so much and so long for so little yield was stressful as the blender always upset Lydia, so I tried the other method suggested, which was just saving extra whole grain rice already cooked and blending that with a little water. This worked great but I had to make A LOT of rice to have enough left over, and we have so many recipes that call for leftover rice it was hard to make enough. It's great to do from time to time, but not as an every day thing.

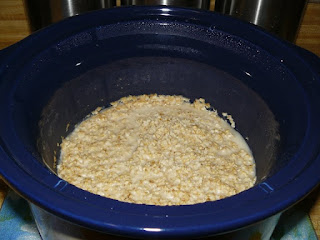
Finally I realized that our overnight oatmeal in the crock pot pureed would make a GREAT whole grain cereal for Lydia, and we make a lot at a time so it was very easy to take some of that, blend it up, and store it in containers for the week. This became Lydia's breakfast and the base of her diet. As time has gone on I've started added things to it, like mashed up banana, apple sauce, pureed blueberries, or pureed mango (whatever fruit is one sale). Sometimes I give it to her plain. I often add a little commercial rice cereal because it's fortified with iron.

For lunch, Lydia has plain yogurt. Sometimes I mix in the same types of things like apple sauce or fresh pureed fruit. If she still seems hungry I'll give her some veggies or some more oatmeal. I've made her yogurt once, but for some reason I can't seem to get it together to do that consistently yet. I'm trying so many new things that I can't put but so many into regular practice at a time! We have mom's old yogurt maker to make it easy though, so I have no excuse!

For dinner for the past few months Lydia has had some sort of veggie that we've pureed and frozen in ice trays. This is so easy...just a can or two a week thrown in the blender with a touch of water and frozen in ice trays. The most common are peas, green beans, and sweet potato. We also tried mixed veggies lately (corn, carrots, peas, and green beans). I usually add commercial rice cereal to this to thicken it up and because it is fortified with iron.For the sweet potato, I usually buy 3 every week or so and bake them all one evening for a side dish for Tom and I and one to be pureed and frozen for Lydia. Usually, a couple times of week I smash up a perfectly ripe avocado and feed that to her for dinner. She loves it! Because I use the whole grain cereal and yogurt as the base of her other two meals, the amount of veggies I have to prepare is very minimal and not too time consuming. I probably puree things on an average of 2-3 times a week.

Dinners for Lydia have begun to get much more exciting in the past weeks! She can now eat almost all foods, so thanks to the Food Mill by Kid Co., she has been able to share new and exciting foods with us!The first thing we shared this way was basic curry! Then she had some Chow Mein, complete with home grown bean sprouts! Among other things we've shared Lentil Barley Stew, and this week she had some Yakisoba. I love it that my baby is already eating foods inspired by cultures all over the world! I hope it helps her appreciate a variety of foods and flavors as she grows older. My good friend Shanna makes a delicious Turkish dish that I think would be great for baby food too, so I'm hoping to try it soon!

This is basically what I have come to in my endeavor to make my own baby food, but keep it simple. None of these things are time consuming, and flow naturally with what I'm already doing. The most work outside of cooking our oatmeal, which we would do anyway, is smashing a banana or avocado, dipping out some applesauce, or pureeing a few veggies or fruits in the blender.

As for the effects on the digestive system, so far the only time Lydia has not been regular since I started this regimen is when I'd run out of yogurt and had to give her something else for lunch. The only time she's had loose stool is when I ran out of oatmeal, and fed her probably too much yogurt. So I'm with Ruth Yaron! Things seem to go along smoothly as I stick to this! ;)

The challenge has been having food to take when we go out and what to do when we run out. We haven't been buying jars, and I have had issues with getting in a pinch. I did discover that oatmeal travels great and is not messy and great for taking in the diaper bag. However, we finally decided to buy a couple of jars each week to have for back up.

Monday, August 2, 2010

Crock Pot Granola, Free Cookbook, and Menu Plan Monday

We stopped buying boxed cereal a few months ago, to save money and improve the quality of our breakfasts. We usually have overnight steel cut oatmeal in the crockpot, or homemade granola. Granola is really easy to make, and you can throw in whatever you have. Most recipes call for different nuts, maybe dried coconut flakes, or wheat germ or dried fruit. All these ingredients are optional. That makes it simple and economical. As long as you have oil, honey, and oats, you're good to go. I try to keep some other things in stock, but it's nice to know they're not necessary for tasty cereal!

I've been trying out different granola recipes and methods for months. I've burnt a lot of rolled oats over that time too! I've found it difficult to get perfect granola, though fortunately somewhat burned, it still tastes yummy. A few weeks ago I had an email in my inbox with a free cookbook called Molly Fresh. It has lots of great fresh recipes for summer, including homemade pesto, which my husband made again this weekend!

The thing that caught my attention was a recipe for making granola in the crock pot. I'd never thought of this, so I decided to try it. I've been doing it about twice a week since! Yes, again I've burnt plenty of it, but I finally learned that as long as I set a timer to stir every 15 minutes or so, it turns out great! I like it because I can make granola in the summer without heating up the house with the oven. I hate reaching into the oven to stir or pulling dishes in and out to stir, which you have to do more often in the oven.

Here's the recipe and a sample of the free cookbook
(click to enlarge) that you can download here.
Some tips:
-I add 1/4 cup of brown sugar. (Hee hee ;)
-It says here to cook it for 5 hours. Every crock pot is different. The first time just stay near it and stop cooking and stirring once it gets to the desired consistency.
-I found it helpful to leave the lid on the crock pot cracked a little.
-Stir often the first time. My crock pot on low is pretty hot. I left it too long the first time (and a couple other times that I forgot about it!)
-Once I accidentally put double the oil and honey. It made a great chewy snack, kind of like granola bars!


Now for this weeks menu plan. I'm veering a little from More with Less. Don't worry. I'm not finished being obsessed with that amazing cookbook. I just wanted to use up some stuff we have this week and try to go all homemade on an old favorite recipe. I just might share it next week if it works out!


Monday: Homemade Pizza
Tuesday: Baked Chicken (not sure of the specifics yet)
Wednesday: Chicken Crescent rolls (with leftover chicken)
Thursday: Homemade Spaghetti
Friday: Chicken Curry (with leftover chicken)
Saturday: Leftovers
Sunday: Vietnam Fried Rice

Sunday, July 18, 2010

Cream of WHATEVER! { Menu Plan Monday}


I promised a while back that I would share how I'd learned to cream up our homemade spaghetti sauce naturally. You see, growing up we always threw in a can of cream of mushroom soup to our sauce. I love the creamy taste, but over the past year or so had become wary of the cream of "insert something here" soup that so many familiar recipes called for, so I started looking for a natural substitute. I found, and tried, a mix consisting dry milk powder, corn starch and various other things that you just added stock or water to when cooking. The consistency worked, but the taste was terrible!

Enter More With Less cookbook with it's basic white sauce recipe. (I realize this is not ground breaking news to the rest of the world, but it was news to me...and good news at that!) Knowing how to make a basic white sauce has opened up a world of possibilities for me in cooking.

Basic White Sauce ingredients include: butter, flour, salt, and milk. Basic Directions are: Melt butter. Add salt and flour and mix. It will chunk up so as you pour in milk, stir with a wisk. Continue cooking and stirring until thickened. More With Less cookbook gives variations of how much butter/flour/milk to add to get varying levels of thickness. I love it.

For the amount and consistency equivalent of a can of condensed cream of "whatever" soup:
3 tablespoons of butter
3 tablespoons of flour
1/4 teaspoon of salt
1 cup of milk
(You can add anything you want to make it a cream of "whatever you want" soup.)


Scratch Cream of "Whatever" soup off my grocery list! One more item down...many more to go!

Now for this weeks menu plan:

Monday
B:Toast and Eggs
L:Leftover rice, beans, and lentils
D:Mandarin Rice Bake (More With Less, pg. 132)

Tuesday
B:Overnight Crock pot Oatmeal
L:Leftovers or PB sandwiches on easy homemade bread.
D:Creamed Chicken over confetti rice squares (More With Less, pg 186)

Wednesday
B:Granola or toast and eggs
L:Leftovers or PB Sandwiches
D:Vietnam Fried Rice and Sweet Potato Bake (More With Less, pgs. 130 & 140)

Thursday
B:Granola
L:Leftovers or PB Sandwiches
D:Kusherie (Egyptian Rice and Lentils) or Lentil Barley Stew (More With Less pgs. 107&108)

Friday
B:Granola or Oatmeal
L:Leftovers or PB Sandwiches
D:Chow Mein (More With Less, pg. 133) (This uses bean sprouts which I'll try to grow starting today!)

Saturday
B:Granola or oatmeal
L:Leftovers or PB sandwiches
D:Quick Chop Suey (More With Less, pg. 133) (This also calls for bean sprouts :)

Sunday
B:Granola or Oatmeal
L:?????
D:Leftovers or sandwiches

**You cooking mavens don't forget to enter my Flirty Apron Giveaway while you're here! **

Monday, July 12, 2010

Homemade Pesto and Meal Plan Monday

This week went pretty well according to plan plus a little! We have been growing our first humble pot of herbs on our deck this year, and I had been just thinking it was time to look up recipes for homemade Pesto when I happened upon this post, by Busy Working Mama. It was just meant to be! Thanks for the extra nudge I needed Busy Mama! Here's where it all began:And yes, the only herb that seems to be flourishing there is Basil, and since we LOVE Pesto around here, I'm O.K. with that. :) Pesto is one of the things I'd been continuing to buy pre-made, so it was great to make our own! Here's how it ended up:


We had to half the recipe for lack of enough Basil. We ate it over whole grain penne pasta and enjoyed every bite! Thanks again, Busy Working Mama! Now for this week's plan:

Monday: Breakfast- Overnight Oatmeal in the Crock Pot
Lunch-Peanut Butter Sandwiches to finish off the homemade bread from last week
Dinner- Honey Baked Lentils (More With Less, pg. 106)

Tuesday:Breakfast-Leftover Oatmeal
Lunch-Leftover Lentils or Peanut Butter Sandwiches
Dinner: Mandarin Rice Bake (More With Less, pg. 132)

Wednesday:Breakfast- Homemade Granola
Lunch- Leftover rice bake or peanut butter sandwiches
Dinner- Easy Curry (More With Less, pg. 136)

Thursday: Breakfast- Granola or Toast and Eggs
Lunch-peanut butter sandwiches
Dinner- LEFTOVERS!

Friday:Breakfast- Granola or Toast and Eggs
Lunch- peanut butter sandwiches
Dinner- Homemade Pizza!

Saturday:Breakfast- Pancakes and Eggs
Lunch- We'll be at a friend's Birthday Party!
Dinner- Creamed Chicken over Rice (More With Less, pg 186)

Sunday:Breakfast- Granola or Overnight Oatmeal
Lunch- You never know!
Dinner- Maybe Vietnam Fried Rice (More With Less, pg 130)

While you're here don't forget to enter MORE WITH LESS COOKBOOK GIVEAWAY that ENDS TODAY, and enter to win an adorable Flirty Apron in Pink/Chocolate (ends 7/30). If you want to reduce waste in your kitchen, enter to win a set of very useful SKOY Cloth (2 winners, ends 7/30)

For more great Meal Plan Monday Posts, visit Org.junkie!

Sunday, June 20, 2010

Review and GIVEAWAY- More with Less!*CLOSED*


I had already started down the road of wanting to live frugally and simply, and had just begun to scratch the surface of cutting out some processed foods. It had bothered me that most recipes I used involved some premade product or another. What if we moved to another country and there was no Pillsbury? What would I do then? I think that deep inside, I did not enjoy cooking was because I didn't feel good about what I was cooking. I wanted to learn to really cook but didn't know where to begin.
Enter More with Less, A World Community Cookbook by Doris Janzen Longacre. This cookbook has revolutionized my cooking and grocery shopping in a matter of weeks! What makes this cookbook so unique?

First released in 1976 and again in 2000 as an anniversary edition, this book is a collection of Mennonite recipes from all over the world answering to a call to respond to world food shortages by using the earth's limited resources more responsibly. The premise is that North Americans typically overeat protein (especially meat), sugar and processed foods. It recommends consuming smaller quantities of meat, and that "combinations of grains and dairy products or grains and legumes form complete protein." In the introduction Longacre also discusses our responsibility and the role of faith in responding to world need as well as tips on how to build a simpler diet.

What I love about this cookbook:

1. All the recipes are simple, but from scratch. In other words, it makes cooking from scratch simple!

2. All the recipes are tested, and it shows! The recipes we've tried so far have turned out every time (except for a couple of errors on the part of the cook ;).

3. It proves that simple and inexpensive does not have to equal tasteless or unhealthy. All the recipes I've tried so far have come out very tasty!

4. It is multicultural, yet still simple and almost all of the recipes involve easy to find ingredients and things we typically already have around.

5. Our spending on groceries has gone down significantly, and the shopping list has become much simpler.

6. Many of the recipes call for 1 or 2 cups of meat. We have started freezing our meat in one cup portions. This has really stretched our meat out and helped us have what we need on hand.

7. Since everything is from scratch, I'm learning the basics of cooking and already starting to experiment on my own.

What I don't like about the cookbook:

1. The only thing that I can think of is that some recipes call for sausage or just plain pork, which we do not eat much of. However, in all of those cases that I've seen so far, it can be substituted with ground beef or chicken and in many cases it can be completely omitted.

All in all, if you want to simplify your grocery list, cut down on your grocery spending, eat less processed foods and learn to cook just about anything from scratch, THIS IS THE BOOK FOR YOU!

This cookbook correlates with the inspiration of this new blog as it assists in frugal, healthy, and simple living. I'm giving away one copy a way as a "kick off" for The Cheap and Choosy!

HOW TO WIN IT:

One Mandatory Entry: Simply leave a comment telling me what interests you about this cookbook.

Leave your email in the comment if it is not clearly posted on your blogger profile if you have one. You do not have to be a blogger to enter this giveaway! You just have to have a valid email address!

For Additional Entries:

1. Follow me on Google Friend Connect (right hand sidebar) and leave me a comment letting me know that you did.

2. Follow me on Twitter and leave me a comment to let me know that you did.

3. Tweet about this giveaway, including a link to this post, and leave me a comment letting me know you did. Please include the permalink of your tweet in the comment! (If you're not sure how to get the link, check out My New Life As a Mom's tutorial here.)

***You may tweet about this giveaway as many times as you want for the duration of this giveaway for an extra entry each time. Just leave a comment with the link each time!***

4. Subscribe to The Cheap and Choosy via email (right hand sidebar) and leave me a comment letting me know you did.

4. Email a friend who you think my be interested about this giveaway and CC it to me at cheapnchoosy@gmail.com, and leave a comment letting me know you did. (This will earn 3 entries! Just be sure to leave me separate 3 comments letting me know you did it.)

5. Blog about this giveaway and leave me a comment with the link to your post.
(This will earn 5 entries. Just be sure to leave 5 comments letting me know you did it!)

U.S. and Canada only. This giveaway is open until Monday July, 12 at 11:59pm EDT. The winner will be chosen using a random number generator. I will email the winner, who will have 48 hours to respond. If winner does not respond within 48 hours, another winner will be chosen. I will post the winner when the selection has been made and confirmed by the recipient.

I am conducting this review and giveaway because I have found this book personally enriching and want to share it. The copy I reviewed and the copy for giveaway are purchased by myself personally. No compensation is being received by me or any other person as a result of this review and giveaway.

Friday, June 18, 2010

Overnight Oatmeal {Soaked Steel Cut Oatmeal}

*Update  as of July, 2012: We still enjoy steel cut oats for breakfast, and it still starts the evening before, but we have found that leaving them on warm in the crock pot overnight is actually a breeding ground for bacteria. We'd been doing it for two years before it ever made us sick. Now we soak two cups of oats with 1.5 TB of vinegar overnight, drain and rinse in the morning, add 3 cups of water again and cook until the desired consistency is obtained. This is safer and more nutritious! You can read why we do it this way here.*

We have for the most part stopped buying prepared cereals (except this week we couldn't resist the two boxes of Chex we got for $.25). I'm trying to make Granola on a regular basis, and our easy homemade bread makes delicious toast. However, the main thing that keeps us having a healthy breakfast on the cheap and with ease is making large quantities of oatmeal overnight in the crock pot about once a week.

There are many opinions about how this is best done. Just Google it and you'll find out. Everyone has a different idea of what the perfect consistency of oatmeal is, and there are many varieties of crock pots. I will share what works for our tastes and our pot! A lot of people put the oatmeal in a bowl inside the crock pot, but ours is too small to make more than an individual serving that way. The reason for doing that however, is that the oatmeal can overcook and get crusty overnight. We don't have that problem with the following method:

Overnight Oatmeal in the Crock Pot:

We use 4 cups of water to 1 cup of steel cut oats. We usually make 2 cups of oats at a time so that we can have leftovers for the week. (I buy steel cut oats by the pound at Whole Foods at $1.15/lb)

1. Heat 8 cups of water to boiling in our electric kettle, and pour it over the 2 cups of oats mixed with a dash of salt in the crock pot and close the lid.

2. We turn the crock pot on "warm". "Low" is not the same. This is key. It's not really cooking, just staying on warm. If your crock pot doesn't have this setting this method may not work for you.

3. Leave overnight and by morning the water is mostly absorbed. It will be a tad soupy, but we like this because otherwise when we reheat it during the week it will be too thick. We scoop out our portions and microwave it a bit if we want it a little thicker and then refrigerate the rest in individual size portions.

Don't have a crock pot?

Overnight Oatmeal on the Stove Top

1. Toast the two cups of steel cut oats in the bottom of large pot (optional), and mix in a dash of salt.

2. Pour 7-8 cups of boiling water over the oats, OR pour in 7-8 cups of water and bring to a boil.

3. Cover with lid and let sit overnight.

4. In the morning, turn on medium heat and let oatmeal cook until it has reached the desired consistency.

Tuesday, June 8, 2010

Toss the Premade Sauce!

Thanks to a mama on the Diaper Pin, I was brought to the realization that I was making spaghetti sauce already and didn't need Prego anymore! I was enlightened to the simple fact that diced tomatoes with a little tomato sauce, garlic, oregano and basil was pretty much what basic spaghetti sauce is. Why did I never think of this? I don't know, especially when I realized that I was already making it every time I made that YUMMY homemade pizza sauce! Seriously, it's as tasty as any pre-made sauce you can find without all the extra preservatives and who knows what else. (Let me say that I realize this is no "new" concept, but for me and perhaps other people like me who were raised on Ragu, it's quite a paradigm shift!)

We eat spaghetti on a very regular basis. It's easy, tasty, and makes a ton of good leftovers. I had been stocking up on Prego, Ragu, you name with the help of The Grocery Game, so we had some to use up. However, I was so ready to make my own I decided to give the rest of that stuff away and finally I made my very own sauce, throwing in a bit of brown sugar with the above mentioned ingredients, pretty much just making it to taste. It was SO yummy!

My mom always made our spaghetti creamy and I love it that way. Stay tuned for how I've learned to cream up the sauce naturally!

Scratch Spaghetti Sauce of my grocery list!!! Woo Hoo! There's more to come!

Wednesday, June 2, 2010

Truly Easy Homemade Bread

*Update as of July, 2012: This is still a delicious and easy recipe, but I have left it in the dust for a no fail, WHOLE wheat, soaked recipe from Trina Holden's Real {Fast} Food. There's no turning back! ;)*


Some time after the dawning of the salad dressing idea and making pizza from scratch, we seemed to keep running out of bread and having to make a special trip to the grocery store just for that. Once you have a baby you don't just "run out to get something" unless absolutely necessary. SO, I looked on line for bread recipes. I'd tried it before, trying to emulate the informal recipe of the dear missionaries in Peru that I spent a few summers with, but found it hard to make and there were too many ingredients to the recipe I had for it to be a simple, cheap thing.

Well, boy did I find an EASY recipe that WORKS every time! We haven't bought a loaf of bread since. Here's the link! You should try it, but warning: It's so tasty you just might try again!

I've since tried to start using whole wheat, and it turned out great...the 3rd time! I used double the yeast, started with the first two cups using whole wheat, and added about 3/4 to 1 cup white flour during kneading. It came out soft and tasty!

Scratch bread off my grocery list! There's more. Just wait!

This post contains an affiliate link.

Saturday, May 29, 2010

My Dwindling Grocery List

I'm not really sure what it was! Was it for the love of pizza? That discussion on the Diaper Pin forum about reducing the grocery bill? A conversation with a friend about being tired of my addiction to Ranch dressing? Being sick of running out of bread? I'm not sure if it was one of those things or a combination of all of them, but I've gotten onto a from scratch roller coaster and I'm on for a ride that I don't think can stop and let me off.

The above mentioned things did all happen around the same time, and somehow, they've all blended together into a marvelous change in how I think about cooking and groceries.

First, I had lunch with a friend and we talked a lot about processed foods. In that conversation I realized how bad it made me feel that I almost daily drenched my spinach salad with ranch dressing. Not only was it fattening, but filled with all things unnatural. I decided that day to learn to make my own salad dressing, so I started by looking on line. There's tons out there, and it looked easy. But all of a sudden I remembered an old spinach salad recipe that I'd loved, especially the dressing. It had never occurred to me to use this dressing on any salad. I pulled it out and made some.

It was SO easy and SO delicious. I have NO desire for Ranch anymore. I look forward to eating salad as much as I do cake and cookies now! It's also made from ingredients that we always have on hand! You can use it with any lettuce, but it definitely compliments spinach well.

Here it is. I usually double it and keep it in a recycled soy sauce bottle.

Olive Oil and Garlic Salad Dressing
1/2 c. olive oil
2TB wine vinegar
3/4 tsp. salt
1 small clove garlic (I usually break it in half to help the flavor out)
1/8 tsp. fresh pepper

Shake together and viola!


Scratch salad dressing off the grocery list! What's next? Stay tuned to find out!

Wednesday, May 26, 2010

Perfect Homemade Pizza


We've had a pizza stone for over 2 years and never used it. I decided it was time to use it or get rid of it. After seeing rave reviews for it on line, I got excited about giving it a chance. We also had a tried and true recipe from a friend, at least tried and true by her, SO I gave it a whirl.
I was VERY nervous about using the stone and cooking a pizza from scratch, since as everyone knows from scratch cooking is "so hard" and destined to fail. (Keep reading for more on that oh so common assumption).
Well, it wasn't hard at all and turned out DELICIOUS! We've had many pizza's since and will have to be excessively tired and have an INORDINATE craving for pizza to EVER order one again! (In other words, I'd have to be pregnant ;).

My husband has often mentioned when buying pizza that the profit margin is ridiculous! It is SO CHEAP to make pizza. We got a big pack of pepperoni and keep it in the freezer, always have leftover sauce (enough for 3 or 4 more pizzas), and as long as we're not out of flour, only have to refresh our mozzarella cheese supply after we've cooked 2 or 3 pizzas. It's become a quick, easy recipe around here because we almost always have all the ingredients around. As long as you think ahead of time so that that the dough has time to rise, you're good to go!

Here's the perfect recipe:

Crust:
1 cup warm water (to prep yeast)
1 packet or TB of active dry yeast
3TB white sugar
3TB olive oil
2.5 c. bread flour
2 tsp. minced garlic
.5tsp. dried oregano
.5 tsp. dried basil leaves

1. Combine water, olive oil, sugar, salt in large bowl. Add flour, then sprinkle garlic on flour...lastly add yeast. Stir together until all clumped together.
2. Dump onto powdered surface and knead until "elasticy". As you knead the dough sprinkle on oregano and basil until it suits your color and taste. Put in large greased bowl and let rise until at least double in size.
3. Preheat oven to 475. Roll out dough on large oiled pizza pan/stone. Place the dough on pan and add your choice of toppings.
4. Bake 12 minutes, or until golden brown. (12 has been the magic number for us!)

Sauce (Stay tuned for how this sauce has forever changed my cooking and shopping!)

2 cloves garlic, minced
16 oz plum, stewed, or diced tomatoes (one can or 2 cups of diced fresh tomatoes)
2TB olive oil
8 oz. can tomato sauce
1tsp. dried oregano
1tsp. dried basil
salt and pepper

Heat oil over medium heat. Add garlic and cook 1 minute. Add tomatoes, sauce, oregano, basil and salt and pepper to taste. Cook until thickened, about 20 minutes.

Wednesday, April 21, 2010

Stock in the Crock

We love Minestrone soup around here. It's a cheap, easy, healthy meal that makes a lot of leftovers and helps us consume more veggies in a delicious way. I was concerned, however, about always using canned chicken stock, knowing it was high in sodium and other preservatives. After some searching on-line I was thrilled to discover that making chicken stock "from scratch" is super easy!

Just toss leftover chicken bones or carcass in the crock pot and cover with water. Then add carrots, celery, garlic, onion, or any other vegetable you desire. For even less waste, I save pieces of those vegetables left over from cooking and put them in a freezer bag until time to make chicken stock again. This way, waste is minimized and often I don't even have to cut veggies up for the stock! We also put chicken bones in the freezer until we have enough to make the stock.

In the evening, I turn the crock pot up to high for about 4 hours and then down to low for about 10 more hours. There's no set rule on the times, I've just read that at least 14 hours is best. I turn it off in the morning to let it cool. After it cools down, I put a colander in my largest pot and pour all the contents into it, lift up the colander letting all the liquid drain out and throw out the bones and veggies. All the wonderful nutrients should be cooked out into the broth, which I divvy up into containers for freezing.

To make things even easier, Harris Teeter has small, ready cooked rotisserie chickens on sale every Sunday. We've started buying one every other week or so since Sunday's are a busy day. We'll have some of the chicken with steamed veggies that evening. Then I'll pick off the leftover chicken and put it in the fridge or freezer for a recipe in the next day or so. Finally, of course, we boil the heck out of that little chicken in the crock pot!