Showing posts with label simplify. Show all posts

Friday, September 14, 2012

"No Poo" 30 Day Challenge

Hello again Cheap and Choosy readers! Today I am going to be sharing with you my journey and results with the "No Poo" method! Want a natural and easy way to simplify another aspect of your life...then read on!

Okay, so are you scared already? I am sure that by the title you are. Don't be, I haven't lost my mind...completely.

Ready....I will not use shampoo or conditioner for 30 days!

Wait! Don't leave....keep reading! I know this sounds crazy! I will explain how I came to where I am now with this challenge.

One month ago, I stumbled across this blog post on Simple Mom. She shares that she has not used shampoo or conditioner in three months! (definitely read her post...she explains it all so well!) My first reaction...GROSS! Which I am sure was, and is your reaction to my challenge. (probably that and...Lorissa has gone off the deep end!)

I learned that shampoo is actually a detergent. When you use it, it strips your hair of the healthy oils it needs, resulting in a vicious cycle...

Here is the vicious cycle that happens:
You wash your hair with shampoo.
It strips out the natural oils and creates a barrier.
Your hair over reacts and produces more oils to compensate for what is lost and hair becomes greasy.
You are frustrated with your oily hair so you wash it almost daily.
You keep stripping your hair of the oil it needs and the ends become frizzy, brittle and damaged.
Now you have to use a conditioner.
The top of your head is oily again. The bottom is dry and frizzy. 
And to top it off, you now need a full arsenal of hair care products just to get it to keep a style.

This has been my frustration! My hair is oily on the top, frizzy and dry on the bottom, and lays flat. Sure, I have curly hair but it just lays flat and is frizzy.

What I use on a daily basis...


I use a volumizing shampoo and conditioner, silk drop, a leave in conditioner, curl shaping spray, mousse, or straightening cream.

All that, and my hair still doesn't look how I wish it would! It is still frizzy, dry, brittle, and falls out like crazy!!!! Seriously...it is amazing I still have hair left with the rate that it falls out! Oh, did I also mention I battle with dandruff. This post is quickly becoming embarrassing.

You might just tell me to switch to a more expensive shampoo, conditioner, or hair care product...but really?! I do not want to, nor will I, spend $15 on a small bottle of shampoo just to get the "results" I think it may give me. Maybe you are one of the lucky ones that has gorgeous hair with out even trying. To you I say...I hate you....I mean...wow, I am so happy for you, that is awesome!  But for me, I am at the desperate...I will try anything point! And that is where this challenge came from. From desperation!

Okay,  enough of how I got to this crazy place...what to do now?!

Drop the bottle of shampoo, put away the bottle of conditioner, and hide the 300 bottles of hair care products you currently have. Go to your kitchen and grab a box of baking soda and a bottle of apple cider vinegar. Yes, you heard that right! Hang in there...keep reading!


Here is the recipe I am currently using:

"Shampoo" : 1 Cup Water
                      1 Tablespoon Baking soda

"Conditioner": 1 Cup Water
                        1 Tablespoon Apple Cider Vinegar

I simply mix up the solution and pour into a squirt bottle that I keep in the shower. From what I have read, you may have to tweak the recipe a bit to what suits your needs. If you have super dry hair you will need to use more vinegar to soften it. Super oily hair, increase the amount of baking soda. You may have to experiment for the first week to find what works for you. I have found that a little does in fact go a long way!

It will take some adjusting and getting used to. For me, getting used to not having a soapy, lathery feeling when I shampoo has been the hardest. I found out pretty quickly, that just because it isn't lathering doesn't mean it isn't getting clean! All of the other bloggers I have read also say, there is a period in which your hair re-adjusts how much oil it makes. After all, it is used to you stripping it out every day with washing it. Because of this, it will over produce oil for a time. This takes about two-four weeks (possibly as long as eight)...hang in there because your hair will adjust!

I have decided to keep a daily record of how my hair looks and is changing. I will update every week to let you know how my hair is progressing...both good and bad!(Remember this is one of the "transition" weeks so my hair will be more oily than usual while it is adjusting)

Week 1 

Day 1- First time to wash with baking soda and vinegar. I was worried the vinegar would make my hair smell funny, but it rinses completely clean- no smell! Hair feels soft and clean! Top doesn't look oily at all! I think I used too much baking soda, the top looks a little dry for once.

Day 2- No wash needed. Hair doesn't look oily yet. Still kind of dry. Must remember to use less baking soda mixture.

Day 3- Top of hair looking oily, time to wash! Hair feels clean and smells clean. Once again, I think I used too much baking soda.

Day 4-No wash. Hair looks a little oily. Put it in a pony tail. No big deal.

Day 5- Washed Hair. Getting used to not lathering. Used a little more vinegar on the ends than the last two times. Hair looks clean and feels clean.

Day 6- Top of hair looks oily. Washed hair. Didn't use enough baking soda. Hair looks and feels oily still. Washed hair again. Much better.  Hair looks, feels, and smells clean this time. I am starting to notice a change in my hair's texture. I also noticed that when I combed my hair only a few strands fell out rather than a huge amount. I wonder if that is at all related?

Day 7- Hair slightly oily but pretty normal for me even when using shampoo. Pulled it back into a pony tail.

So far I am pretty pleased with it. I wonder what my hair will be like when the transition period is over. If it is anything like the other blogger's results, I will be thrilled!

What do you think? Are you brave enough? Desperate enough? Crazy enough to give this challenge a try?

If you are still not convinced take a look at these posts: 

MSNBC.com actually wrote an article on this! Read it here!

Simple Mom gives you a hair update after using this method for two years! Read it here!

Great information from The Hair Pin on switching from shampoo and why...read here!

On Just A Couple Acres has a very encouraging post about her transition with curly hair...here! and some great "No Poo FAQ" here! 


Think about it...what if you could have beautiful hair and it not cost you a small fortune?! Forget about all of the money, chemicals, waste, and frustration that go with shampooing your gorgeous locks!

On top of that ...why not? Why not give it a try? If you hate it, you can always go back to shampoo. But if you love it, you have found the cheapest and easiest way to achieve beautiful hair.

If you are brave, desperate, crazy, or hippie enough (I think this may be why I am pretty open to the idea...my mom secretly wanted to name one of us girls Moonbeam when we were born...no joke!) to give this challenge a try with me, leave a comment below and let me know you are in! Then each week I will share my progress with you, and you all can let me know how you are doing!

This was my first post ever on going "NO POO"...You can see all of my updates here:

 No Poo Week 2 Update
No Poo Week 3 Update
No Poo Week 4 Update
My Curly Hair Post 30 Day No Poo

Monday, May 28, 2012

Homemade Taco Seasoning {Chicken Taco Soup Recipe}

My friend Rachel passed a recipe on to me for "Chicken Taco Soup" that is delicious and super easy to throw together in the crock pot or prepare in bulk and store in the freezer for multiple crock pot meals.

One of the ingredients on the original recipe is "one packet of taco seasoning," and scribbled out beside is a homemade alternative that I was pleased to find is comprised of ingredients that we keep in our spice cabinet! I love scratching pre-made ingredients off my shopping list! Use this in any recipe calling for a packet of taco seasoning:


Equivalent of One Packet of Taco Seasoning:

1 Tbsp. chili powder
1/4 tsp. garlic powder
1/4 tsp. onion powder
1/4 tsp. crushed red pepper flakes*
1/4 tsp. dried oregano
1/2 tsp. ground cumin
1 tsp. salt
1 tsp. black pepper


*This is a bit spicy, so if you prefer a milder seasoning, leave out the red pepper flakes.

The possibilities of course are endless with this. It makes delicious "taco meat," and I've even made taco flavored hummus!


Now for the yummy soup recipe:


Chicken Taco Soup:

1 chopped onion
1 each 16 oz. canned chili beans*,
black beans, and corn. (I use frozen corn)
1 8 oz can tomato sauce
1 cup of chicken stock or broth
2 10 oz cans of diced tomatoes
1 Packet of Taco Seasoning (or above recipe)
2-3 chicken breasts

For topping:
Sour cream (We use plain yogurt and it tastes great!)
Shredded cheddar cheese
Tortilla Chips (or Fritos )


*I stopped using kidney beans and started preparing my own black beans via Trina Holden's instructions in Real {Fast} Food to eliminate canned beans!

Just dump everything in the crock pot and make sure the chicken is below the surface of the liquid ingredients. Cook 5 hours on high or until chicken is cooked through. Pull out chicken and shred, and return to soup. That's it!

{Confession: We eat this with Fritos, which I was pleasantly surprised to discover has a refreshingly short ingredient list of only three things! You should check it out. I'm not going as far as to call it a "health food" though! ;) }

To Prepare in Bulk:

 I quadruple the recipe in a large pot on the stove top using the same amount of chicken as the original recipe for more with less. I divide into as many quart size freezer bags as possible and freeze.Then a few hours before serving, I just dump a frozen quart bag of it in the crock pot and put it on high.


***************
Thanks for stopping by! I invite you to:

Stop by my Etsy shop, Seams to Streams here.
Follow me on Twitter here.
Join me on Facebook here or here!


***************

Linking up with Raising Homemakers, Growing Home Blog, and This Chick Cooks

Monday, May 7, 2012

Space Saving DIY Toy Stove and Art Easel {Chalkboard Contact Paper}


We have a small home, and I am more than content with that. However, my two and a half year old daughter is getting to an age where a toy kitchen would be an ideal toy for her, but there simply is not room.

My daughter "Peanut", being the creative and imaginative girl that she is, found a solution for that!

We have a small bed side stand type cabinet in her room that I once used for her books (which are now on a book shelf). One day Peanut started opening the door and putting her toy cupcakes in the cabinet to "bake" them, pretending that it was a stove.

I looked at the little cabinet and thought, "I can paint four burners on top and paint the front black so that it looks like the window into a stove!"

Since I have very little experience painting, and very little time right now, I thought it would be a long time before I would get around to such a project.

That was until I discovered Chalkboard Contact Paper.  The little stove is the first thing that came to mind. How easy it would be to just cut out four little circles and stick them on, as well as the front "window" of the stove?

I ordered a roll of the contact paper for less than eight dollars, and as soon as possible after the contact paper arrived, I did just that. It took about 15 minutes, and that because I was doing other things at the same time.

I also ordered a little cooking set, and now my daughter has a little stove to cook on without adding a mite of furniture to our home!


Another toy that I have thought would be ideal for my daughter if there were sufficient space is a toddler art easel. We have a little toddler table for tea parties and artwork, so for both reasons of space and the fact that we really don't need another place for her to draw and color, I had let the idea go completely.


But alas, we have an exposed side to our large old refrigerator in the kitchen and it occurred to me that I could made it into a little chalkboard! Since it's magnetic, we can also use magnets to secure paper there for her to write, color, or paint on too. There you go! The primary functions of an art easel only without a tray for supplies. I am thinking of ways to attach something to hold chalk and markers to the fridge, but for now I prefer to not have them laying about freely anyway.


 The possibilities of this amazing contact paper are endless! I have a few other things I can't wait to do with it!

Super cheap. Super easy. Super fun!

*******************

Tip Junkie handmade projects

Tuesday, April 5, 2011

The Boba Carrier - At Home and Abroad {A Review}


I was blessed with the opportunity to review the Classic Boba Carrier in Breeze during our recent trip to Brazil.


The Boba Carrier is a soft structured carrier, ideal for wearing babies from 15 to 45 pounds. It is an attractive and extremely comfortable carrier. The wide shoulder and waist straps are sturdy and comfortable made with high density foam. The military grade waist buckle is easy to snap and extremely easy to adjust. My husband and I found it very easy to adjust the waist back and forth when we took turns wearing Lydia. All you have to do is snap and pull on one strap and it tightens easy and centers itself on your waist.

One of the the things that make this soft structured carrier stand out among all the others is that it has removable foot straps. The foot straps have given me so much peace of mind. We have worn Lydia for very long periods of time and I did not have to worry about the carrier cutting into her dangling legs because I could easily slip her feet into the straps.


The other outstanding characteristic of the Boba is that the back is designed to be a bit higher than others. This is another key to making the Boba the absolute best carrier available. Even when Lydia tried to lean back, I did not feel the pull uncomfortably in my back AT ALL. I had briefly tried using another soft structured carrier that a friend let me borrow before I received the Boba, and I had found it a bit uncomfortable because Lydia was leaning back and it was pulling on my shoulders. With the Boba I have not felt that even once. It is so perfectly comfortable for myself and my baby! Actually, the whole reason the Boba came into being was because the creators were experiencing this problem with other popular carriers, along with leg discomfort for their baby and therefore the Boba was invented with a higher back to prevent the "leaning back" feeling, and foot straps, to prevent the problem of leg discomfort for toddlers and larger babies. You can read the story here.


I am busting at the seams with wonderful things to tell you about my experience with this product! Whether at home or traveling abroad I have come to see the Boba as an absolute essential, and you know me...I love finding things that I don't need to keep it simple. THIS, however will simplify your life in the having of it. I am so thankful that we had the opportunity to test and review the Boba for this trip. It was priceless.


Even before our trip to Brazil the week before we left I started using the Boba. It made getting ready for our trip so much easier. I had to make so many quick trips in and out of stores for last minute things. It would have been a pain to have to get the stroller in and out and in and out and in addition to that to not have my hands free in the process. Using the Boba made it go so much more smoothly. I quickly discovered that Lydia LOVED being on my back and that I loved having her there. Learning to get Lydia on and off of my back went a lot more quickly and smoothly than I thought it would. I found these videos very helpful!

As we embarked on this trip I was a little nervous because I have a history of back and hip problems that is usually aggravated by travel. I was hoping that carrying a toddler would not make that problem worse. I am here to tell you that I had almost none of the hip or back pain that I've had on previous trips and I wore Lydia a whole whole lot. We carried her everywhere in the Boba. We didn't even take a stroller with us. It was AMAZING how easy it was to get around this way.

The verdict is that traveling with a toddler is easy IF you have a Boba Carrier. I cannot imagine our trip without it. I seriously don't think it would have been possible. We walked, and walked, and walked, and walked. When we weren't walking, we were in and out of taxis, combis, buses, metros, trains, etc. We developed a system where we would wear her on the front for metros and buses and such forms of transportation so that we could protect her as those can get pretty crowded. We could also sit down while wearing her on the front. Invariably whichever of us was wearing Lydia would be offered someone's seat! Then, when we were walking long distances, we'd put her on our backs as this seemed overall more comfortable with a toddler. Our friends' baby is 10 months old and a good bit smaller, so she is more comfortable on the front all of the time.


In Brazil we spent two weeks in Belo Horizonte with our friends who are missionaries working with the children in that city's largest slum at a place called The Lighthouse. We also took a few days with our friends to go to Rio de Janeiro. While in Belo, at the Lighthouse, we were trying to help out as much as we could with the ministry there. Even there we wore her a lot to help us be able to do more things and because she just loved it!


I mostly took care of Lydia but was able to help out with one group of girls a couple of times and to do a little work in the kitchen. How was that possible? The Boba! Here's a picture of me kneading bread for well over 20 people with Lydia on my back! Honest truth: It did not hurt!


 I had to take various trips to the store for food, milk, etc. and I always went walking with Lydia on my back. It was such an adventure. It's a very hilly place too so it was a great workout.
In Belo Horizonte on the weekend we visited a local park to see the monkeys. We took a bus most of the way and walked the rest. Lydia napped in the Boba for a good part of the time but she woke up in time to see the monkeys!


 Also while in Belo Horizonte, we went out for Acai, as it is served very deliciously at a little shop near the Lighthouse. There we discovered a FABULOUS use of the Boba that ended up being a LIFE SAVER throughout the whole trip, especially when we went to Rio. In spite of the fact that Brazil is incredibly baby friendly, there are many small stores and shops that do not have baby chairs, and if they do, they do not have straps. They are just a smaller, higher chair. We discovered, however, that we could keep Lydia perfectly secure by strapping her into any chair with the waist buckle of the Boba. Here's Lydia enjoying acai this way. More pics of this to come...


 Then came the trip to Rio. As I've said, I don't think it would have been possible without the Boba. We required a good deal of luggage as we were carrying a pac n' play. How we would have managed with all that at the bus station and to and from if we'd been using a stroller or our arms, I have no idea! Then while in Rio, of course we were walking an incredible amount, out and about seeing the sights, and eating out of course since we were away from our "home away from home." Here are some pics of Lydia at the famous Christ the Redeemer statue of Rio de Janeiro!

Under the Christ the Redeemer Statue.


Here we have the hood attached and hanging because Lydia had just been napping. Normally we kept it attached and neatly rolled up. I love how easy it is to do!

Just a little happy! ;)

This typical high chair at a nice restaurant did not have straps. Never fear...

The Boba kept her nice and secure!
 
Sleeping baby ready to leave Rio. This hood snaps on and off and if you want to leave it on it has attached bands that make it easy to roll up.

The verdict after a very thorough trial of the Boba is that of all the baby equipment available today, I think it is the most practical and the most worth investing in. It's right up there with the crib and changing table in my opinion, especially if you plan to do any traveling. Even here in the States, there are so many places where a stroller is cumbersome to use. I find that Lydia is much happier in the Boba than in a stroller as well. 

I recommend the Boba over other popular soft structured carriers. My friends in Brazil have another brand, and they tried the Boba and found it to be more comfortable and simple to put on. As I mentioned before, I had tried another kind of carrier briefly and felt a bit uncomfortable with Lydia leaning back. I also find the waist much easier to attach with the Boba. The buckle is mega quality and easy. And again, no other carrier as adjustable detachable foot straps!

Back at the Lighthouse in Belo Horizonte when Lydia and I were resting in our room, she started whining and I asked her what she wanted. We had the Boba laying on top of a suitcase. She walked over to the suitcase, picked up the Boba, walked over to me with it and lifted it up to me with a grunt. When I didn't immediately do anything about it because I was trying to find the camera to catch the adorable moment in a picture (at which I was unsuccessful), she sat down and started trying to put it on herself!

Please take a moment to go to Boba's website and learn more about this product! If you're trying to decide what kind of carrier to get, I recommend you stop your search here! If you are not sure about investing in a carrier, I encourage you to do it. It will be money well spent!


Wednesday, January 26, 2011

Very Easy {Two Ingredient} Homemade Liquid Handsoap

A while back I wrote about how using bar soap over body wash for bathing helps avoid waste, saves money, and saves unnecessary packaging. I guess this is again where the "choosy" wins out over the cheap, because when it comes to hand soap, I prefer liquid. I don't like the  grunge that inevitably builds up on the soap (or so it always seemed at my grandparents' house growing up).

I read on a forum somewhere a few months back that you could make your own liquid hand soap by grating up a bar of soap and boiling it in 6 cups of water. I finally got around to trying it last week. I was concerned when I "Googled" it because I almost always saw glycerin as an essential ingredient in most recipes. If you follow my blog you know I like things uber simple with as few and as "common" ingredients as possible. Glycerin is very cheap and would last a long time though so I'm not knocking it. However, since I didn't have it around, I asked a fellow blogger if it was necessary and discovered that if you use regular bar soap, rather than castille soap, the glycerin is not needed because it already has it.

It worked REALLY well, and was simple enough to make it worth doing again. I was treating it as an experiment, and doubtful that I would do it regularly because of time constraints, but I definitely will continue because it's very easy to do while cooking dinner or any time for that matter. Here's how:

1. Grate bar of soap. (I used Ivory because that's what we typically have around.)


2. Bring 6 cups of water to a boil and add bar soap. Stir until soap is dissolved.


3. Turn off heat and let cool for 15-30 minutes or long enough to be cool enough to put in soap dispensers.


4. Put in dispensers and let sit until it thickens up. With Ivory it turned a whitish color.


Scratch liquid handsoap off my shopping list! Yay!

*Added Note, 2/18/2011
When I went to make another batch of this I realized that a good bit of soap was still clumped together in the dispensers. I just added a bit of warm water to each one and shook them up and they started shooting out soap again, a bit more liquid, but plenty of soap to do the job!


Tip Junkie handmade projects

Friday, January 21, 2011

Simplifying and Creating Space with Hanging Jewelry

I love getting rid of things. I like getting rid of clutter. It takes a lot of effort as I'm not the most organized by nature, but it's so refreshing to travel light. Less is definitely more in my book.

Some time back I saw a friend's bedroom and noticed she had all of her jewelry hanging on pins on a corkboard beautifully covered with fabric and ribbon.

I had my jewelry in a medium sized jewelry box on a small shelf in our room. Since we have a big closet, we'd already moved our desk and desk top computer in there to create space in another room, and I was ready to get that little shelf into the closet as well since there was a perfect spot for it that was otherwise unusable space. The only problem was where to put the jewelry box. I knew it was time...jewelry on the wall, jewelry box out of here!

I was going to make a fancy one, but I found an attractive one for 8 bucks or so at Wal-Mart that matched our color scheme well. Yet again, less is more! Here it is:


I should also make a rule that if it can't fit attractively on this board, I shouldn't have it, or should get rid of something else!

Tuesday, January 4, 2011

Homemade Macaroni and Cheese on the Stovetop


 *Disclaimer: I realize this is nothing new to the rest of the world, but please humor me. I began this blog originally by logging my experiences in learning to make things myself that I was used to buying pre-made. It's a little challenge I've been enjoying. Please don't think badly of my mother. I wasn't the least interested in these things as a kid and didn't pay attention. It's not her fault! :)
 
 I spend time with my friend Rachel on Thursdays, and the last time I was there, she made some mac' n cheese with...you won't believe it...CHEESE! I was pretty excited because I hadn't seen it done that way, that I *remember.*

Yet again, I was surprised to learn how to make something simple from scratch that I'd only ever known to come out of a box. I must say, my mom did make homemade macaroni and cheese when I was a kid, but it was in the form of a casserole, and I never thought of it as an option for a quick, stove top meal.


I haven't got measurements because she just eye balled it, and so did I. It's pretty hard to go wrong.

1. Start about 2 cups? of macaroni noodles boiling.
2. In a saucepan, melt 2 or 3 tablespoons of butter.
3. Add about 2 cups of shredded cheddar cheese.
4. Stir in "a little" milk (sorry for the vagueness.)
5. Continue cooking and stirring on medium low heat until blended.


6. When I realized I was just making a white sauce with cheese, I added a tablespoon of flour to thicken it a little.

7. When noodles are done, strain them and then mix them into the sauce.


This is where the "choosy" wins out over the "cheap," because cheese is expensive. That's why I'll just make this every once in a while. I'm not at all opposed to a good ol' box of Kraft Mac n' Cheese every now and then either. I'm just glad to know I can do it myself. This way a comfort food becomes a healthy food...relatively speaking.;)

Scratch boxed Mac n' Cheese off my grocery list!

Friday, December 10, 2010

Swiff and Fluff on the Cheap!

 As we have all hard floors I had become quite a fan of the Swiffer Sweeper. I also used the Swiffer cloths for dusting. We went through them very quickly until some time ago I saw an article on the Diaper Pin about using microfiber cloths (typically sold the auto section of most department stores) in the place of disposable Swiffer sweeping cloths.

This is my most recent microfiber towel that I haven't cut yet.
While at a discount store I picked up a super cheap microfiber cloth and tried it out. It was amazing, doing exactly what the Swiffer cloth did only...it was reusable! I just shake off the excess dust over the trash can and then toss the cloth in with the dirty towels.


The microfiber cloth was a little large for my purposes so I cut it in half and did not sew the cut side to see if it would fray and after washing it for months, it has not frayed at all!

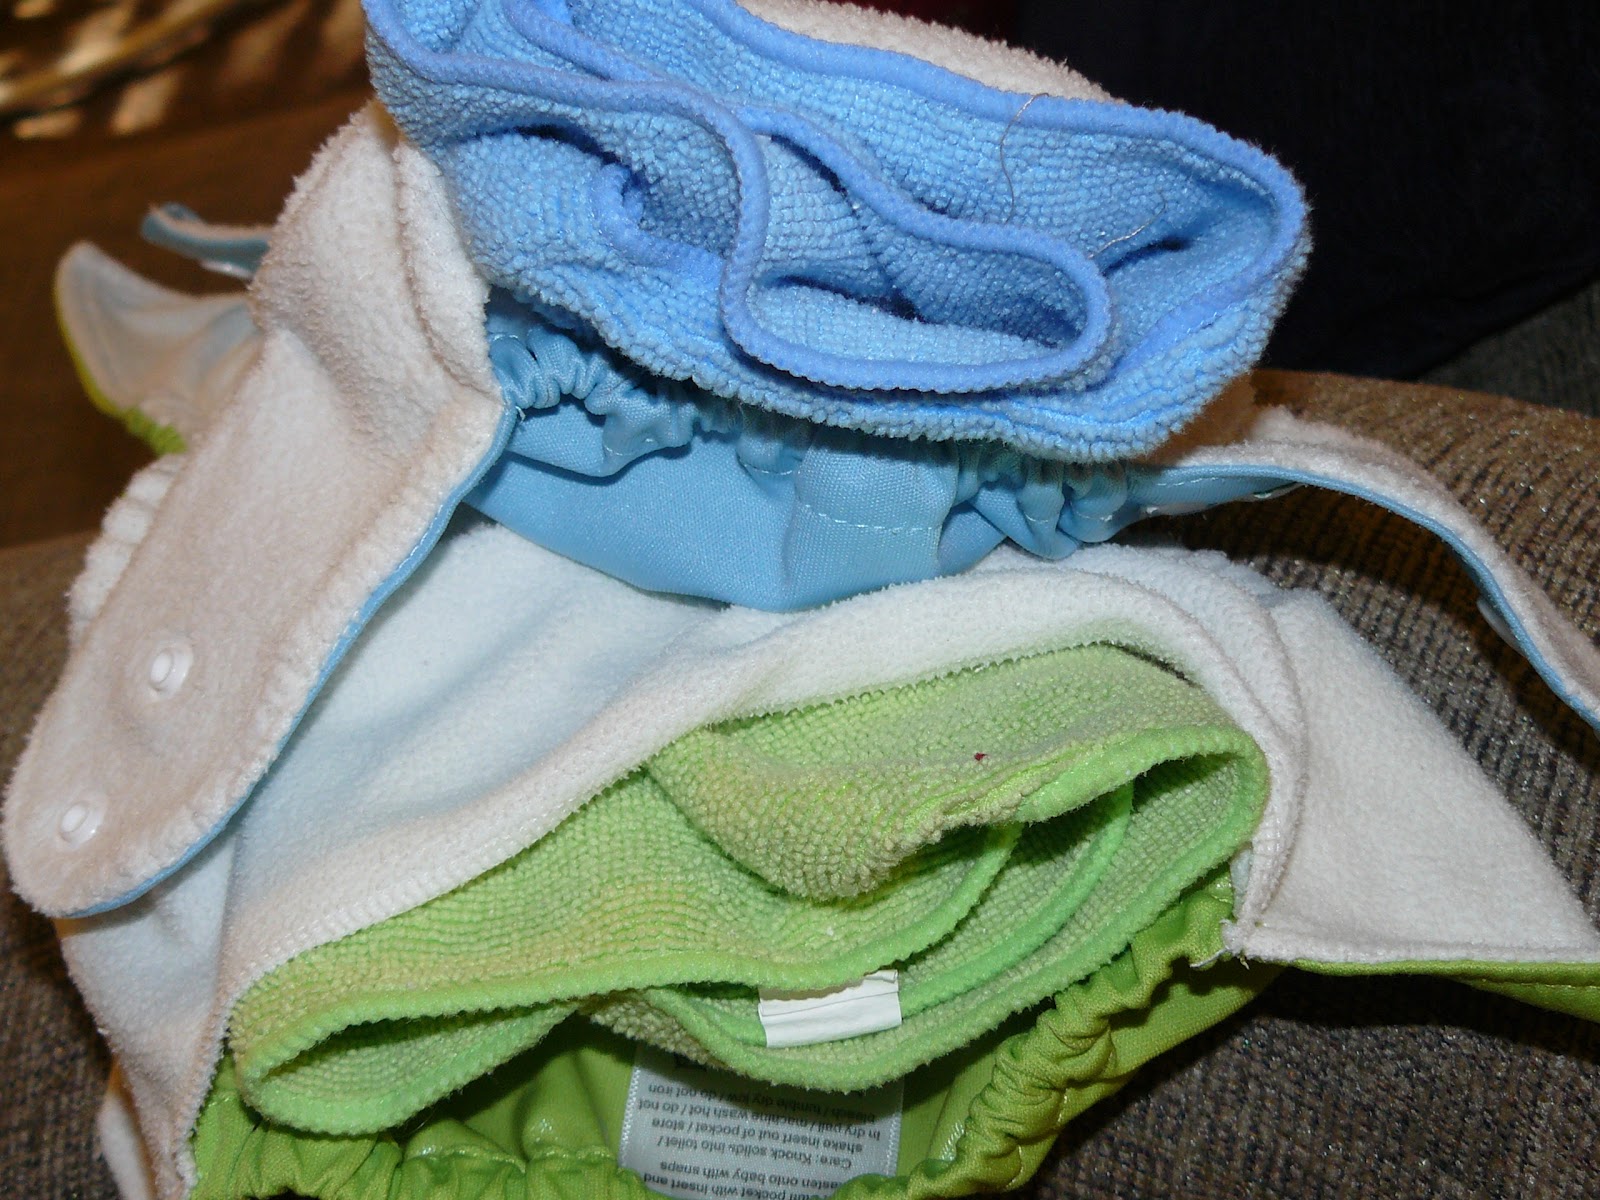
Later, I received a Nykibaby One Size pocket diaper for review from Monkey Toe Diapers that came with a microfiber towel as an insert. I discovered that it was a very absorbent and trim insert. I didn't even realize how cheap the towels were at the time, but was seriously hoping to find more to use as inserts!

I didn't have to wait long! On a recent trip to Dollar Tree and discovered that they have microfiber towels for a dollar each!


I snatched up a few white ones for dusting and sweeping and a few pastel ones for stuffing and fluffing my pocket diapers. They work SO well and are so cheap. PERFECT for adding serious extra absorbency to an overnight diaper!

And yes I did match them on purpose...pitiful I know! I also have a purple diaper and a purple cloth but it was dirty! :)


Thank you Dollar Tree!!!!!!!!!!!!!!!!!!!!!!!!!

Monday, September 6, 2010

So Long,Pillsbury! {Menu Plan Monday}


By the time I finish this post it may become "Menu Plan Tuesday" as I'm busy trying to adjust to life with a crawler and no more morning nap (unless it's just the teething).

I will continue with Menu Plan Monday, because my family needs to eat, and it provides a motivation and accountability to sit down and plan out meals and make a grocery list accordingly. This prevents a ton of stress for the rest of the week. Otherwise, you would find me around 5:00 or 5:30 p.m. with my usually by then tired baby (and all that that implies), scratching my head, looking into the fridge and pantry asking myself, "What in the world am I going to cook for dinner?" Then, hubby would come home to a frazzled frustrated wife and no hope of dinner anytime soon. He's so sweet that he would not complain or criticize, but I'd be frustrated and as we all know, that's not a fun state to be in.

Oh and about that grocery list made according to my menu plan...have I mentioned that my grocery list is SOOOO simple thanks to More With Less Cookbook? The simple list of things we get weekly or bi-weekly covers many many recipes in the book. At most I get one or two things a week that I buy with one specific recipe in mind, and usually can use it for a few other recipes too. The rest are staples that go in a variety of recipes...and did I mention that they're mostly low cost ingredients as well? Just Sayin'...

I believe I have mentioned that before More With Less, I could barely cook. That is not entirely true, but my list of recipes that I felt confident about was very short, ie maybe 4, and most of them, if not all, involved some pre-made food or another as a main ingredient.

One of the recipes that I loved and served to everyone who came over for dinner at some point (sorry friends if you had it twice...or..thrice...or...yikes!) is affectionately known to us as "Chicken Crescent Rolls" or to our Spanish or rather Spanglish speaking friends as "Bolitas de Chicken."

It was passed on from a family friend, and may have originally come from the back of some some Pillsbury product or another because the essential ingredient was Pillsbury Crescent Rolls.

Do you know that it never occurred to me that I could make the dough myself? I remember thinking many times, "What would I do if we moved to another country? I wouldn't be able to get Pillsbury Crescent Rolls!" It's sad I know, but it's the truth.

Then one day, I was looking through...you'll never guess....More With Less Cookbook, and I found a recipe that looked very similar to my beloved Chicken Crescent Rolls, except...wait a minute...you use biscuit dough? Don't tell me they're just basic biscuit dough! But, sure enough, that turns out to be the case and I realized that you don't need some fancy recipe or ingredients.

So, I finally got around to trying Chicken Not Crescent Rolls without buying refrigerated dough! And guess what? It was easy! I spent about 5 minutes making the dough and maybe 2 extra minutes rolling it out. I dirtied about 2 more dishes, and felt no worse for the wear.

Here are some way overly processed pictures of the experience. I got a little carried away with Picnik. (It's so much fun!) The food may be less processed but the pictures definitely are not!

Here's the ball of dough I prepared first and put in a bowl in the fridge while I got everything else ready.


While doing this I had some chicken boiling, and then chopped it up. I used about 4 breasts. I was going to save some aside to freeze in 1 cup portions for other recipes, but forgot. So we ended up with LOTS of chicken balls!


Then I mixed in half a bar of cream cheese, a dash of salt, a dash of pepper, and a bunch of dried oregano and basil


Next I rolled out the dough and used a mug to cut circles. We don't have cookie cutters so I always use cups or bowls. They work great and offer a pretty good variety of size options! Yay for things you don't really need!!!


Then I grabbed a ball of the chicken mix and placed it in the middle of one of the discs of dough and wrapped it up. I found it actually easier to work with and stretch around the chicken than the refrigerated dough! In the background you can see the bowl of melted butter and the bowl of homemade italian breadcrumbs that I roll the ball in once it is formed.


Finally I ended up with two 9x9 baking dishes full of these yummy things.


With the store bought dough, you cook it for 25 minutes. I found that these needed a bit longer. I forgot to set the timer so I'm not sure how long. We just went based on the look. Next time I'll start with 30 min. and go from there.

So, Scratch Pillsbury Crescent Rolls off my list...FOREVER! Yay!

This week.....

Monday: Chick Fillet :)
Tuesday: Homemade Pizza
Wednesday: Pakistani Kima (pg. 131, More With Less) (We tried this last week...Y.U.M. and really quick!)
Thursday: Beirrocks (pg. 144, More With Less)
Friday: Lentil Barley Stew (pg. 107 More With Less)
Saturday: El Burgos (pg. 138 More With Less)

Monday, August 16, 2010

Vintage Zoo Reusable Sandwich Bags-Put to the test

I've been quiet for a while about sewing projects as preparing for my cloth diaper events this fall has taken up most of my free time.

However, I have been putting my reusable sandwich bags to the test! A while back, I made more of these bags out of this adorable vintage zoo toile fabric. They are lined with PEEVA tablecloth material and have an aplix closure. I have been using these bags both for carrying Lydia's baby food, bib, spoon, and napkin in her diaper bag. I've also been using one of the original bags for Lydia's Bummas wipes and solution. This sandwich size bag is perfect for sandwiches, but as you see it can be used other ways as well. Below you can see it flat with the baby food and accessories sitting beside it for size reference.


Here you can see it stuffed with the baby food, bib, and spoon.


After at least 2 months of use, I've found it to do the job very efficiently. It's easy to wipe out and since we're phasing out of paper towels, I've found the paper towel holder great for hanging the sandwich bags on to air out!


If the outer fabric gets soiled, you can hand wash it and let it hang dry. I'm using Charlie's Soap All Purpose Cleaner for my hand washing!

There are many more of these in the works! I just love this fabric, don't you?